In summary:
- Your GPS is not a primary tool; it’s a backup. Master map and compass skills, especially reading contour lines.
- The risk isn’t universal. Navigational challenges, gear failures, and hazards differ wildly between the Canadian Rockies and the Irish hills.
- Redundancy saves lives. Always have a physical map, know how to use it, and carry the right layers for the worst possible weather, not the weather you started in.
- Practice is paramount. Whiteout navigation and emergency skills must be muscle memory, drilled in clear weather before you need them in a storm.
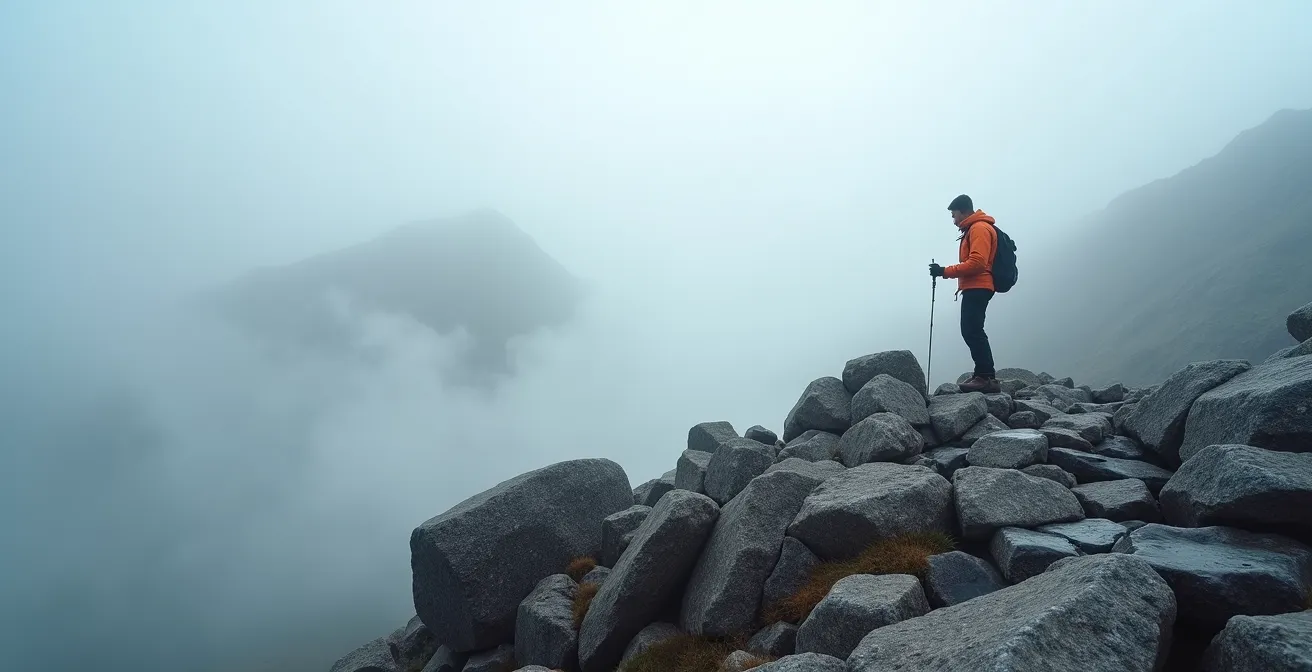
The moment visibility drops to zero above the treeline is a defining one. The world shrinks to a few feet of grey, sky and snow blending into a disorienting sphere. All sense of direction vanishes. In this moment, panic is a luxury you cannot afford, and the gear in your pack is only as good as the knowledge in your head. Many hikers believe that a good GPS or a quick weather check is sufficient preparation. They treat navigation as a universal skill, assuming a technique that works on one mountain will work on all others.
This is a dangerous oversimplification. The truth is far more nuanced and demanding. Safe high-alpine navigation isn’t about mastering one rigid skill set; it’s about understanding how your specific environment—from the vast glaciated terrain of the Canadian Rockies to the sudden maritime storms of the Irish Reeks—fundamentally changes the rules of engagement and the gear you can trust. A strategy that is perfectly safe in one context can be fatal in another.
This guide moves beyond the generic advice. We will dissect the critical differences in terrain, weather, and risk that you must understand to travel safely in exposed alpine zones. We will explore why a map is not just a backup, how to interpret scramble ratings across different systems, and why your gear choices must be dictated by regional specifics, not just brand names. This is the real-world knowledge that keeps you moving when the world goes white.
To navigate this complex topic, this guide is structured to build your understanding from foundational skills to specific environmental challenges and advanced preparation. Follow along to see how context is the key to survival above the treeline.
Summary: Above the Treeline, Blind: A Guide to Navigating in Zero Visibility
- GPS vs. Paper Map: Why You Must Know How to Read Contour Lines?
- Class 1 vs. Class 3 Scrambles: What Do These Ratings Really Mean for Your Safety?
- Bear Spray vs. Noise: Which Defense Is More Effective on High Alpine Trails?
- The “Bluebird Day” Trap: Why You Should Always Pack a Shell Jacket?
- Carbon vs. Aluminum Poles: Which Is Better for Rocky Alpine Terrain?
- The GPS Mistake That Strands 50 Hikers a Year on the East Coast Trail
- Beacon, Shovel, Probe: Which Brand Offers the Best Reliability for Novices?
- How to Train for a Winter Ascent in the Chic-Chocs Mountains?
GPS vs. Paper Map: Why You Must Know How to Read Contour Lines?
In a whiteout, the debate between digital and analog navigation ends. You must master both. Relying solely on a GPS is irresponsible; batteries fail in the cold, touch screens are useless when wet, and satellite signals can be fallible. It’s not a question of if your electronics will fail, but when. Your paper map, protected in a waterproof case, and your compass are your lifelines. They don’t have batteries. Their primary function is to give you a mental picture of the terrain around you—a picture that is essential when you can no longer see it.
Understanding contour lines is the heart of this skill. They allow you to “see” the shape of the land—the ridgelines, valleys, and cliffs—that your GPS waypoints can’t describe. This is especially critical in environments with dramatically different characteristics, where a simple elevation number tells you nothing about the hazards present. The challenges of navigating above a low treeline in Ireland are completely different from those in the high Canadian Rockies.
This table illustrates how the very point where you become exposed dictates the navigational challenges you’ll face. In Ireland, exposure begins early, plunging you into a world of bogs and sudden Atlantic storms. In Canada, you have more altitude to gain, but the terrain above is a complex mix of glaciers, cornices, and potential avalanche slopes.
| Location | Treeline Elevation | Navigation Challenge | Primary Hazard |
|---|---|---|---|
| Scotland/Ireland | 1,600 feet | Low treeline means exposure starts early | Bog bursts, peat hags, Atlantic storms |
| Canadian Rockies | 11,500 ft (decreasing northward) | Vast glaciated terrain above treeline | Avalanche slopes, cornices, crevasses |
| White Mountains NH | 4,500 feet | Fog very disorienting, difficult route finding | Extreme winds, sudden weather changes |
Case Study: The 200-Meter GPS Datum Error
A simple setting on your GPS can have life-or-death consequences. A hiker in Canada’s Garibaldi Park, using the wrong map datum (WGS84 instead of NAD83), found their GPS position was off by over 200 meters. In glaciated terrain, this error was enough to lead them perilously close to walking off a cornice. A similar risk exists in Ireland’s MacGillycuddy’s Reeks, where using the British Grid system instead of the correct Irish Grid (ITM) on a GPS can place you on the wrong side of a dangerously narrow ridge. This highlights a critical lesson: relying solely on GPS in glaciated terrain is irresponsible. The mountains are harsh teachers, and a mistake you get away with once may not be forgiven a second time.
Your 5-Step Whiteout Navigation Plan: When GPS Fails
- Take compass back bearings: Before ascending past the treeline, point your compass at the summit, note the bearing, and subtract 180 degrees. This is your direct route back to safety.
- Create waypoints at obvious features: Don’t just rely on digital waypoints. Mentally and physically note ridgelines, large boulders, individual trees, lakes, and valleys on your map. These are your real-world anchors.
- Practice pace counting: Know how many double steps it takes you to cover 100 meters on flat, uphill, and downhill terrain. In a whiteout, distance estimation is as important as direction.
- Use terrain ‘handrails’: Follow obvious linear features like creeks, ridgelines, or the edge of a valley. These are your guides through the white, recognizable even in the worst conditions.
- Deploy physical markers if necessary: If you are completely disoriented, don’t be afraid to leave a trail. Use washers with flagging tape, leave a ski pole ahead and walk to it, or simply follow your own boot tracks from the ascent if they are visible.
Ultimately, the GPS is a powerful tool for confirming your position, but the map and compass are the tools for understanding it. In a whiteout, understanding is what will get you home.
Class 1 vs. Class 3 Scrambles: What Do These Ratings Really Mean for Your Safety?
The term “scrambling” covers a wide spectrum of activity, from a steep walk to low-grade rock climbing. The rating systems—like the Yosemite Decimal System (YDS) used in North America or the British Grade system—are an attempt to quantify this risk. But these numbers can be dangerously misleading if you don’t understand their context. A Class 3 scramble in the Canadian Rockies is not the same as a Grade 2 scramble in the Irish Reeks, even if both require the use of hands.

The key differentiator is often the “no-fall zone” reality. Above the treeline, the rock is sharp and a simple stumble can result in serious injury. On a Class 3 or Grade 2/3 route, a fall is likely to be fatal. Your focus must shift from simply moving upward to absolute security with every hand and foothold. The rating is a guideline, but the quality of the rock and the exposure are the reality.
Case Study: The Deception of Ratings
Consider the contrast between Mount Temple in the Canadian Rockies (rated Class 3) and Howling Ridge on Carrauntoohil in Ireland (a Grade 2/3 scramble). Both routes demand a no-fall commitment. However, the nature of the risk is different. The “choss” (loose, sedimentary rock) common in the Rockies can make a seemingly easy Class 2 section treacherous, while the solid granite of many Irish mountains provides security. The critical factor is not the number, but the rock quality under your hands and feet. As one analysis notes, the rocks are sharp, and if you stumble, it’s easy to cut up your hands. Most accidents happen at these elevations when people push on, failing to turn around until it is too late, misjudging the terrain’s true nature beyond its simple rating.
Therefore, your assessment of a scramble must go beyond the guidebook number. Look at the type of rock. Is it solid granite or flaky limestone? Consider the weather. Wet rock dramatically increases difficulty. Look at your team. Is everyone comfortable with the exposure? The rating is the beginning of your decision-making process, not the end.
Treat every scramble with respect. The mountain doesn’t care what number the guidebook assigned. It only cares about gravity.
Bear Spray vs. Noise: Which Defense Is More Effective on High Alpine Trails?
Wildlife encounters are an inherent part of hiking above the treeline, but the nature of the risk varies dramatically with location. The discussion of “bear spray versus noise” is a perfect example of a geographically specific problem. For hikers in the Canadian Rockies, it is a critical safety consideration. For those hiking in Ireland, it’s completely irrelevant.
In Canada, especially in the Rockies where grizzly bears roam, carrying bear spray—and knowing how to use it—is non-negotiable. Research has shown it to be the most effective deterrent in a negative encounter. The key is not just having it, but being prepared to deploy it in seconds. This means carrying it on your hip or chest strap, not in your pack. Simple noise-making, like bear bells, is largely considered ineffective; bears can become habituated to the constant, monotonous sound. A sudden, loud human voice command is far more likely to alert a bear to your presence in a non-threatening way.
In stark contrast, no bears exist in Ireland. The safety concerns are entirely different. The primary animal hazards you might encounter in the Irish highlands are rutting stags during the autumn in areas like Killarney National Park, which can be aggressive, and unpredictable livestock on open, unfenced hillsides. The appropriate response is not a can of pepper spray, but awareness, maintaining a respectful distance, and never getting between a farm animal and its young.
This highlights a fundamental rule of backcountry travel: understand the specific hazards of your environment. Don’t just import safety advice from another country or context without critical thought. Your preparation must be tailored to the real, not imagined, risks of the trail you are on.
- Canadian Alpine Zones: Your primary concern is surprising a bear. Make noise by talking or shouting periodically. Differentiate your response based on the species: grizzly tactics differ from black bear tactics. Always check wind direction on exposed ridges before deploying bear spray to avoid it blowing back into your face.
- Irish Hillwalking: Your primary concern is respecting agricultural land and wild, but less threatening, animals. Give rutting stags a very wide berth, be cautious around cattle with calves, and always close gates behind you.
Before you pack, ask yourself: what animals live here, and what is the local protocol for sharing the trail with them safely? The answer will tell you whether to pack bear spray or simply common sense.
The “Bluebird Day” Trap: Why You Should Always Pack a Shell Jacket?
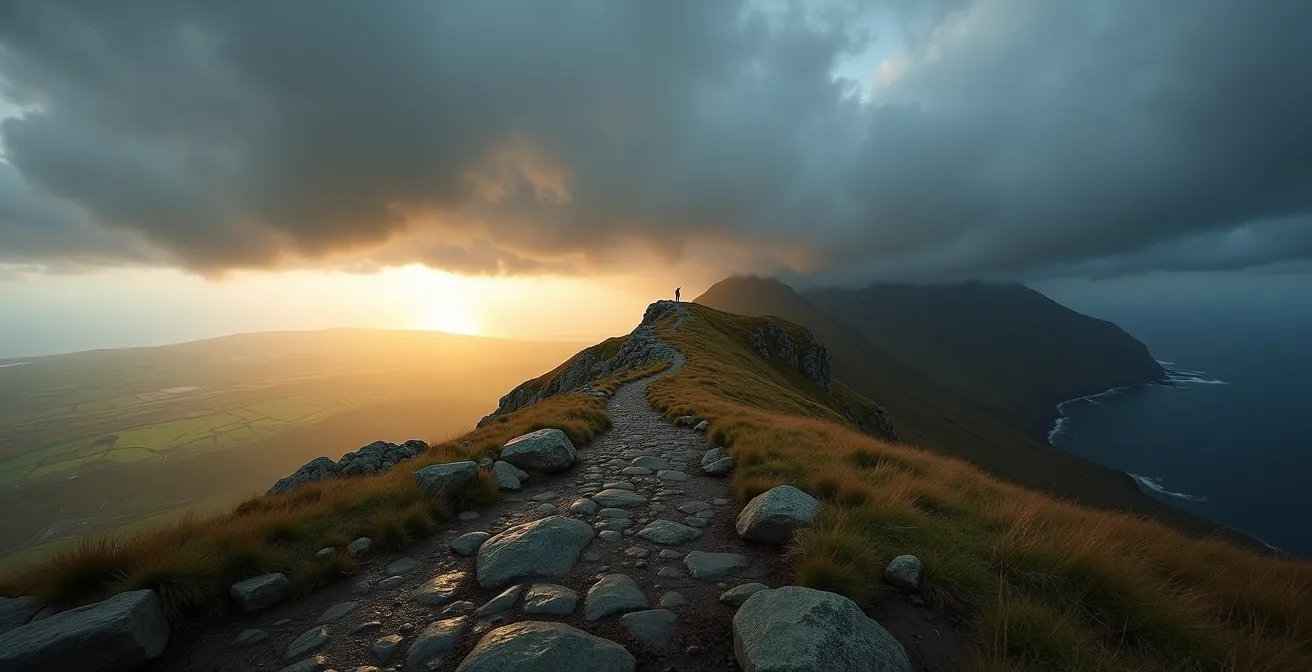
It’s the most seductive lie the mountains tell: a perfectly clear, calm, and sunny morning at the trailhead. This is the “bluebird day” trap. It whispers that you don’t need that heavy shell jacket, that the extra layers are just dead weight. Believing this lie can have severe consequences, as mountain weather, particularly in maritime climates like Ireland or coastal British Columbia, can change with astonishing speed.
The temperature can drop 20°C in minutes during an afternoon hailstorm in the Canadian Rockies, born from convective buildup on a hot day. In Ireland, a sunny start at the base of a mountain like Mweelrea can transform into a gale-force whiteout at the summit within an hour as an Atlantic front rolls in. A “bluebird day” is not a guarantee of safety; it is an invitation to be prepared for the inevitable change.
This is why your layering system, and specifically your shell jacket, is one of the most critical pieces of safety equipment you carry. It is your personal storm shelter. It protects you from wind, which can strip heat from your body dangerously fast (wind-chill), and from rain or snow, which can lead to hypothermia. The choice of shell jacket itself should be context-dependent. A heavy-duty Gore-Tex Pro shell is essential for the persistent, driving rain of an Irish winter, whereas a lighter, more packable shell might be sufficient for the typically drier (though still volatile) summers in the Alberta Rockies.
Case Study: The Mweelrea Weather Trap
Mweelrea, the highest peak in County Mayo, Ireland, is a classic example of the Atlantic weather trap. Hikers often start from the coast in beautiful sunshine, only to be engulfed by cloud and wind as they gain elevation. When bad weather hits, the instinct is often to rush. But as the British Mountaineering Council warns, when bad weather hits snowy hills, there’s a good chance you could experience a whiteout. Trying to “wing it” and navigate by “the force” in these conditions is a recipe for getting lost. The weather doesn’t care about your schedule. You must be prepared to slow down, make deliberate navigational decisions, or even turn back.
Always pack for the worst possible weather on the mountain, not the weather at your car. The weight of a shell jacket in your pack is nothing compared to the weight of regret when you’re caught in a storm without one.
Carbon vs. Aluminum Poles: Which Is Better for Rocky Alpine Terrain?
Trekking poles are essential tools above the treeline, providing stability on uneven ground, reducing strain on your knees during descents, and acting as probes for snow depth or water crossings. However, the choice between the two primary materials—carbon fiber and aluminum—is not a simple matter of preference. It’s a decision that should be dictated by the specific terrain and conditions you expect to encounter.
Carbon fiber poles are prized for their lightness, which reduces swing weight and saves energy over a long day. However, their primary weakness is their reaction to sharp impacts. Carbon is brittle; when it fails, it fails catastrophically, shattering and becoming useless. Aluminum poles are heavier, but they are more durable. When stressed to their limit, they will bend rather than break, often remaining functional enough to get you off the mountain.
This distinction becomes critical when you compare the typical terrain of the Canadian Rockies with the mountains of Ireland. The choice of pole material is a calculation of risk and benefit specific to each environment. For instance, the extreme cold of a Canadian winter can make carbon fiber more brittle, increasing the risk of catastrophic failure when you can least afford it.
The following table breaks down how each material performs in these distinct environments, highlighting that the “best” pole is entirely dependent on context.
| Material | Canadian Rockies Performance | Irish Mountains Performance | Critical Factor |
|---|---|---|---|
| Aluminum | Bends (doesn’t snap) on jarring scree slopes | Heavier on long Reeks traverses | Winter reliability in -30°C |
| Carbon Fiber | Brittle in extreme cold, catastrophic failure risk | Light but vulnerable to quartzite boulder impacts | Shatters on sharp impact |
| Key Features | Carbide tips essential for Canadian scree | Grip critical for wet limestone | Extended foam grips for traverses |
So, which should you choose? If your priority is durability and you frequently travel over rough, rocky scree or in extreme cold, aluminum is the safer bet. If you are moving fast and light on well-defined trails with less risk of jarring impacts, the weight savings of carbon fiber may be worth it. Know your terrain, and choose your tools accordingly.
The GPS Mistake That Strands 50 Hikers a Year on the East Coast Trail
The East Coast Trail (ECT) in Newfoundland, Canada, is a world-class coastal hiking route, but it has a dark side: it is a hotspot for GPS-induced errors. The combination of a constantly evolving trail due to coastal erosion, a salt-air environment that is brutal on electronics, and hiker over-reliance on single, often outdated, GPX tracks leads to dozens of rescue incidents each year. Hikers find themselves on a “trail” that no longer exists, trapped by the tide or facing an impassable washout.
This is not a uniquely Canadian problem. The same pattern of GPS-fixated hiking leading to dangerous situations is seen on Irish coastal walks like the Beara Way or along the Cliffs of Moher. Unofficial “desire paths” and complex private land access boundaries can easily mislead a hiker who is staring at a line on a screen instead of observing the landscape and signage around them.
Case Study: The Blank White Page of Doom
The core of the problem is often a misunderstanding of how the technology works. As Mountain Safety NZ points out, if your GPS is on without reception, it drains the battery fast while seeking cell towers. If you haven’t properly downloaded maps for offline use, you can end up with a blank white page showing only your location dot in a void. When this happens, the worst thing you can do is continue walking, hoping something improves. The correct response is to stop, take stock, and use your analog tools—your map, compass, and brain—to fix your position and make a safe plan.
The solution is not to discard GPS technology, but to integrate it into a more robust and redundant navigation workflow. Never trust a single source of information. Your primary tool should be your brain, cross-referencing multiple inputs to build a complete picture of your location and route.
A proper digital cross-check workflow is essential. Before you even leave home, you should download the official GPX track from a reliable source like the East Coast Trail Association (ECTA) or a local Irish walking club. Use apps like CalTopo or Gaia, which allow you to overlay this track on multiple different map layers (topographic, satellite, etc.) and work in airplane mode to save battery. Cross-reference this with recent online trip reports for the latest information on trail conditions, washouts, or reroutes. Finally, always have a physical, waterproofed backup.
Your GPS is a powerful tool, but it’s a terrible master. Use it to support your decisions, not to make them for you.
Beacon, Shovel, Probe: Which Brand Offers the Best Reliability for Novices?
When entering the realm of winter travel in serious mountain terrain, the “holy trinity” of avalanche safety gear—beacon, shovel, and probe—becomes mandatory. However, the question of which brand is best is the wrong question to ask. The real question is: “Do I need this gear at all, and am I trained to use it?” The answer depends entirely on your location and objectives.
The need for avalanche safety equipment varies dramatically between Canadian and Irish mountain contexts. For anyone venturing into the backcountry of the Canadian Rockies, the Chic-Chocs in Quebec, or the ranges of British Columbia in winter, this gear is not optional. It is essential life-saving equipment, and traveling without it is grossly irresponsible. The risk of avalanches is real, widespread, and affects even seemingly moderate terrain.
In Ireland, the situation is vastly different. While small, localized avalanches can and do occur in very specific gullies in places like the MacGillycuddy’s Reeks during rare, heavy snowfall, the risk is relevant to less than 1% of winter hillwalkers. For the vast majority of hikers, even in winter, the primary hazards remain navigation in whiteouts, hypothermia, and slips on icy ground, not avalanches. Carrying the “holy trinity” in most Irish winter conditions would be unnecessary weight and could foster a false sense of security.
If you are traveling in an area where avalanche gear is necessary (i.e., Canada), the focus for a novice should be on simplicity and reliability, not fancy features. Under the extreme stress of a real rescue, complex functions become a liability. Here’s what to prioritize:
- Beacon: Choose a modern, three-antenna digital beacon with a simple, intuitive display. Speed and ease of use in finding the signal are paramount.
- Shovel: The blade must be metal, never plastic. Avalanche debris can set like concrete, and a plastic shovel will shatter.
- Probe: It should be at least 240cm long and have a quick-lock mechanism that is easy to operate with gloved hands.
Most importantly, gear without knowledge is useless and dangerous. Before even purchasing a beacon, you must take an accredited avalanche safety course, such as the AST 1 in Canada. This training is where you learn how to read avalanche bulletins, recognize hazardous terrain, and practice rescue scenarios until they become second nature.
Don’t ask which brand to buy. First, ask where you are going. Then, get the training. Only then should you choose the tool.
Key Takeaways
- Environment dictates strategy: Your skills and gear must adapt to local geology, maritime vs. continental weather, and specific hazards.
- Redundancy is safety: Never rely on a single tool like a GPS. Mastering map and compass skills is your ultimate, non-negotiable backup.
- Ratings are relative: A “class” or “grade” is a guideline, not a guarantee. Rock quality, weather, and conditions are the true arbiters of difficulty.
How to Train for a Winter Ascent in the Chic-Chocs Mountains?
Preparing for a major winter objective, like an ascent in Quebec’s Chic-Chocs Mountains, is a holistic process that goes far beyond simple physical fitness. It is an integration of technical skill, mental resilience, and logistical mastery. Furthermore, the specific demands of the objective’s environment must dictate the focus of your training. The training regimen for the deep cold and complex avalanche terrain of the Chic-Chocs is fundamentally different from what’s required for a winter traverse of Ireland’s MacGillycuddy’s Reeks.
A winter trip to the Chic-Chocs demands preparation for extreme cold tolerance, with temperatures often dropping below -30°C. Your training must include building a strong cardiovascular base for hours of breaking trail through deep snow and mastering layering systems to manage moisture and prevent cold injuries. Most critically, it requires sophisticated avalanche knowledge.
A winter traverse in the Irish Reeks, by contrast, presents a different set of challenges. While the cold is less severe, the primary battle is often against relentless wind, moisture, and navigation in zero-visibility whiteouts. The focus here is on efficient movement over icy, mixed terrain (verglas), technical proficiency with an ice axe and crampons, and, above all, the ability to perform dead reckoning navigation with a map and compass for extended periods with absolutely no visible landmarks.
Case Study: The Nature of the Whiteout
The very nature of a “whiteout” differs. In the Chic-Chocs, as noted in one guide, in whiteout conditions where cloud settles on a snow surface, everything becomes an indistinguishable whiteness, affecting your very perception of up and down. In the Reeks, the challenge is often a driving, wet snow or cloud that obliterates landmarks while you are on steep, icy ground. In this scenario, the ability to travel precisely on a compass bearing is your greatest asset. It requires constant practice to know your position and trust your instruments over your disoriented senses.
Regardless of the location, a holistic expedition preparation model should be your guide. This isn’t just a workout plan; it’s a complete system for developing competence and confidence for the winter mountains.
- Technical Skill Drills: Practice self-arrest, crampon techniques, and especially map, compass, and altimeter work until they are second nature. You must be able to relate the slopes on the ground to the contours on your map in your sleep.
- Mental Rehearsal: Visualize the trip. Walk through decision points in your mind. Practice your whiteout navigation protocol on clear, familiar terrain so you’re not learning under pressure.
- Logistical Mastery: Become an expert at interpreting weather forecasts and avalanche bulletins (like those from Avalanche Canada or the MWIS in the UK). Always plan multiple escape routes.
- Physical Conditioning: Build a solid aerobic base. A good benchmark is being able to maintain an average pace of 5km/h on the flat and understanding how to use Naismith’s rule to accurately time your ascent.
- Emergency Preparedness: You must be able to deploy an emergency shelter, like a pyramid tarp or a mountain tent, quickly and efficiently, even in high winds and with cold hands.
True readiness for the winter mountains is not measured by how far you can run, but by the depth of your skills, the quality of your decisions, and your profound respect for the power of the environment.