In summary:
- Swap traditional lamb for local Canadian cuts like Alberta beef chuck or lean bison, adjusting cooking times accordingly.
- Replace Guinness with regional craft stouts from Quebec or Ontario to introduce unique coffee, caramel, or maple notes.
- Use waxy potatoes from PEI and Canadian root vegetables, which hold their texture better, especially if freezing.
- Bake a side of traditional soda bread or bannock using Canadian heritage grains like Red Fife for better flavour and digestion.
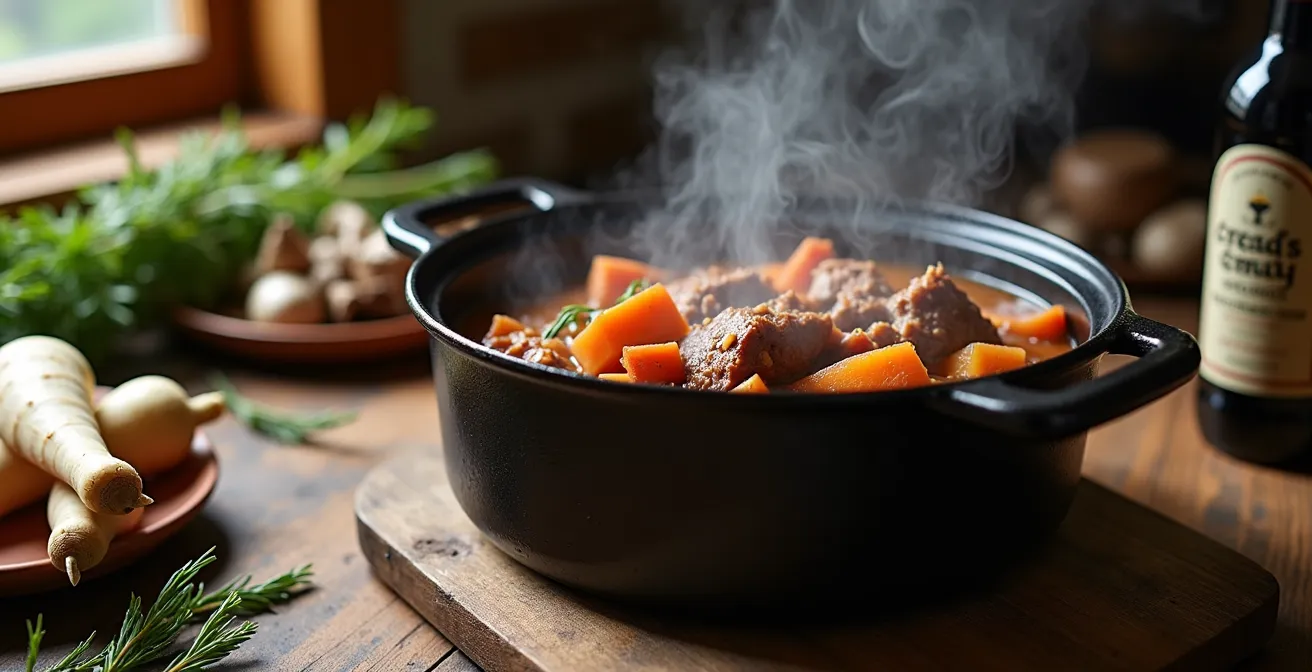
There’s a deep, comforting magic to a bowl of Irish stew, a dish that speaks of rolling green hills and cozy evenings. For many Canadians with Irish roots or a love for hearty cuisine, recreating that authentic flavour is a cherished goal. But what happens when traditional lamb is hard to find or you want to embrace the ingredients from your own backyard? The common advice is to just follow a recipe, but that often misses the point.
Many recipes are rigid, failing to explain the principles that make a stew truly great. They call for specific cuts and brands, leaving you lost when faced with the bounty of a Canadian market. The secret to a truly spectacular stew isn’t about slavishly following an ancient formula. It’s about understanding the soul of the dish—the slow transformation of tough meat into tender morsels, the deep harmony of root vegetables, and the malty backbone of a dark beer. This is the principle of terroir-driven cooking.
So, what if the key to the most authentic Irish stew you can make in Canada lies not in importing Irish lamb, but in celebrating Canadian ingredients? This guide is built on that philosophy. We will explore how to honour the spirit of Irish stew by thoughtfully substituting and adapting, using the science of cooking to unlock the best of Canada’s local produce. We’ll move beyond the recipe and into the chef’s mindset, turning your Canadian kitchen into a place where tradition and terroir meet.
This article breaks down the core components of a perfect stew, from the science of slow cooking to selecting the right Canadian meats and beers, ensuring every bowl you prepare is both deeply traditional in spirit and proudly Canadian in substance.
Summary: Adapting Classic Irish Stew for the Canadian Kitchen
- Why Does Slow-Cooking Stew for 6 Hours Change the Nutritional Profile?
- Lamb Neck vs. Shoulder: Which Cut Makes the Most Tender Stew?
- Guinness vs. Craft Stout: Which Pairs Better with Rich Beef Stew?
- The Temperature Mistake That Makes Your Meat Tough and Chewy
- Freezing Stew: How long Can You Keep It Before the Texture Degrades?
- The Winter Pantry: What 5 Staples Should You Stock for Nordic Meals?
- Kale vs. Cabbage: Which Green Adds More Vitamins to Your Colcannon?
- Why Is Traditional Irish Soda Bread Better for Your Digestion Than Commercial Yeast Bread?
Why Does Slow-Cooking Stew for 6 Hours Change the Nutritional Profile?
The idea of cooking a dish for six hours might seem like it would destroy all the goodness within, but the opposite is often true for a stew. The magic of slow cooking lies in its gentle, low-temperature approach. Unlike high-heat methods that can degrade delicate nutrients, a slow simmer is a process of transformation, not destruction. It’s about unlocking flavour and nutrition that would otherwise remain locked away in tough muscle fibres and dense root vegetables.
While some water-soluble vitamins, like vitamin C and B vitamins, can leach out of the ingredients, they aren’t lost. They simply migrate into the cooking liquid. This is why the broth of a stew is liquid gold from a nutritional standpoint. As a chef, I never discard this liquid; it’s the very soul of the dish, carrying flavour and a significant portion of the meal’s vitamins and minerals. Studies on cooking methods confirm this principle: what is lost from the solid is gained by the liquid.
Case Study: Traditional Cooking Methods and Nutrient Preservation
The core benefit of slow-cooking is its ability to preserve nutrients that are sensitive to high heat. While it’s true that water-soluble vitamins can leach into the broth, this becomes an advantage in a stew where the liquid is consumed. According to analyses on the effects of cooking, slow-cooking techniques ensure that the final dish, when consumed as a whole with its broth, provides a more complete nutritional profile. This makes the long, slow simmer not just a method for tenderness, but also a strategy for holistic nutrient retention.
Furthermore, this gentle process makes nutrients more bioavailable. The slow breakdown of collagen in meat and cellulose in plants makes them easier for our bodies to digest and absorb. So, that six-hour simmer isn’t just developing deep, complex flavours; it’s also making the meal more nourishing and wholesome. It’s a testament to a time-honoured technique that is both culinary art and practical science.
Lamb Neck vs. Shoulder: Which Cut Makes the Most Tender Stew?
The heart of any great stew is the meat, and the choice of cut is paramount. Traditionally, Irish stew calls for lamb, specifically tougher cuts that benefit from a long, slow cook. The two classic contenders are lamb neck and shoulder. Both are rich in connective tissue and fat, which is exactly what you want. Over hours of simmering, that tough collagen breaks down into luscious, mouth-coating gelatin, giving the stew its signature body and the meat its fall-apart tenderness.
Lamb neck, with its higher fat and collagen content, arguably produces the richest result, but it can be harder to find in a typical Canadian supermarket. Lamb shoulder is a more widely available and excellent alternative. But here’s where the Canadian terroir comes in: why limit ourselves? The same principle of using tough, collagen-rich cuts applies perfectly to local meats. Alberta beef chuck is a phenomenal substitute, offering a deep, robust flavour. For a leaner but uniquely Canadian experience, bison is a fantastic choice, though it requires a slightly shorter cooking time to prevent it from drying out.
This image showcases the beautiful differences between these cuts, a key to understanding your ingredients.
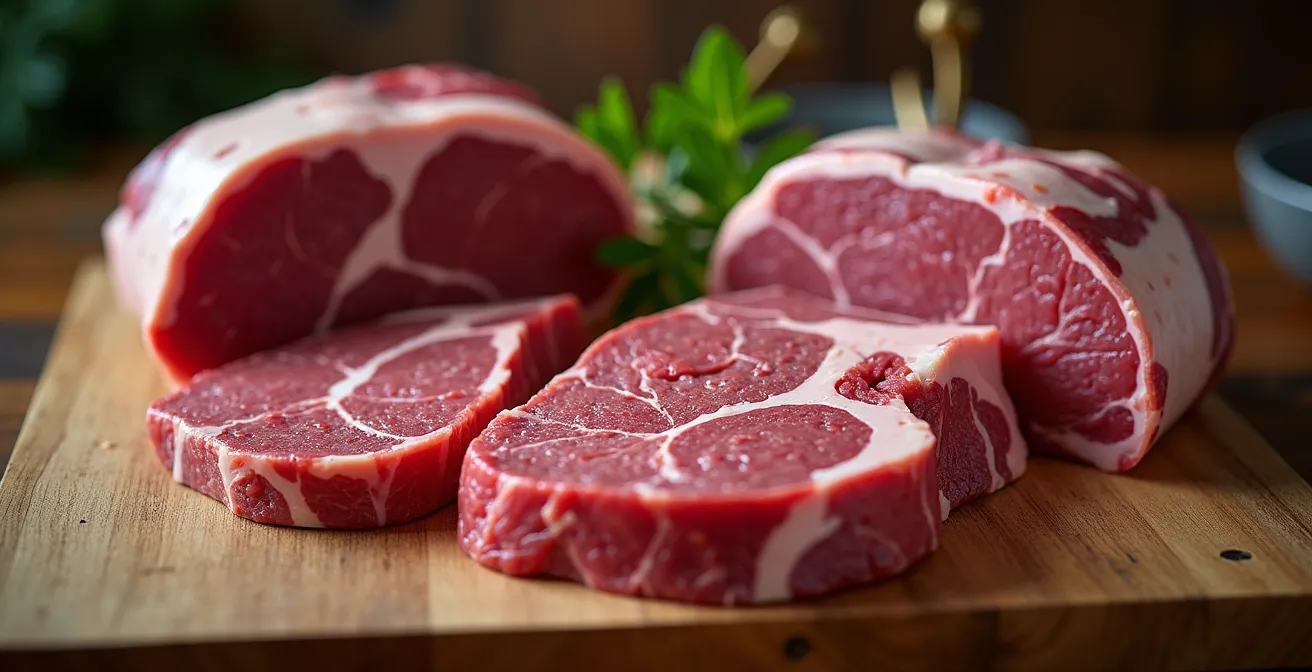
Notice the marbling in the beef chuck and the deep red of the lean bison. A good butcher is your best friend here. Tell them you’re making a stew, and they will guide you to the perfect cut, one that promises to melt in your mouth after a few hours of patient simmering. The following table breaks down how these Canadian options compare.
This comparative data, adapted from sources like analyses of traditional stew recipes, helps translate Irish tradition to the Canadian butcher counter.
| Cut Type | Fat Content | Collagen Level | Canadian Availability | Best Cooking Time |
|---|---|---|---|---|
| Lamb Neck | High (20-25%) | Very High | Limited (specialty butchers) | 3-4 hours |
| Lamb Shoulder | Moderate (15-20%) | High | Moderate (major chains) | 2-3 hours |
| Alberta Beef Chuck | Moderate (18%) | High | Excellent | 2.5-3 hours |
| Canadian Bison | Low (2-3%) | Moderate | Good (specialty stores) | 1.5-2 hours |
Guinness vs. Craft Stout: Which Pairs Better with Rich Beef Stew?
If meat is the heart of a stew, the beer is its soul. Guinness is the iconic choice, and for good reason. Its dry, roasty character and creamy texture add a profound depth and a touch of bitterness that cuts through the richness of the meat. It’s not just an ingredient; it’s a seasoning that builds the stew’s flavour foundation. However, to think Guinness is the only option is to miss out on the incredible diversity of Canada’s craft beer scene.
The principle here is to look for the same characteristics that make Guinness great: roasted malt flavours. These notes of coffee, chocolate, and caramel are a perfect complement to the savoury, browned flavours of the meat, a phenomenon chefs know as the Maillard reaction. As one expert puts it, this pairing is a natural fit. Master Cicerone Rich Higgins explains this synergy perfectly in his guide on how to pair stout with food, noting how the beer’s character enhances the dish.
What keeps stouts related to each other is their roasty flavors, which pair really well with tons of foods. Pairing with a stout is like adding a bit of roasted or grilled flavor to foods
– Rich Higgins, Master Cicerone and Certified Sommelier
So, which Canadian stout should you choose? It depends on the nuance you want to add. An oatmeal stout from Quebec will add a silky, creamy texture. A coffee stout from British Columbia will amplify the roasted notes. A milk stout from Ontario can bring a subtle sweetness to balance the dish. Don’t be afraid to experiment. Visiting a local brewery and asking for their best stew-friendly stout is a great way to connect your cooking to your local community.
- For coffee notes: Choose British Columbia coffee stouts with roasted malt profiles.
- For a creamy texture: Select Quebec oatmeal stouts like St-Ambroise for a silky mouthfeel.
- For a touch of sweetness: Try Ontario milk stouts with lactose for caramel undertones.
- For a unique Canadian flavour: Consider an Alberta dark maple ale for a distinctly local profile.
- For smoky complexity: Look for Nova Scotia peated scotch ales, which can add another layer of depth.
The Temperature Mistake That Makes Your Meat Tough and Chewy
Here is the single most common mistake I see home cooks make with stew: boiling it. After carefully selecting a beautiful, collagen-rich cut of Canadian beef or bison, they get impatient and crank up the heat. This is a fatal error. A rolling boil is the enemy of tender stew. It causes the muscle fibres in the meat to seize up, tighten, and become tough and stringy, squeezing out all their moisture. It doesn’t matter how long you cook it after that; the texture is ruined.
The goal is a “bare simmer,” where a bubble breaks the surface only every second or two. This corresponds to a temperature of about 85-90°C (185-195°F). At this gentle heat, the magic happens: the tough collagen slowly melts into rich gelatin without shocking the muscle fibres. For ultra-lean Canadian game meats like venison or bison, this is even more critical. There’s very little fat to protect the meat, so maintaining a low, steady temperature is the only way to achieve a tender result. You should sear these lean cuts first for flavour, but then add them only in the last hour of cooking to prevent them from drying out.
Another factor to consider in the Canadian climate is the low humidity from central heating in the winter. This can cause the liquid in your stew to evaporate faster than you expect, which concentrates flavours but can also cause the temperature to spike. To prevent this, always use a tight-fitting lid. For an even better seal, you can use a “cartouche”—a circle of parchment paper cut to fit directly on the surface of the stew. This is a classic chef’s trick to control evaporation and maintain that crucial, gentle heat. As authorities like Dr. Andrew Weil note, slow cooking at lower temperatures isn’t just for texture; it also helps preserve more nutrients.
Freezing Stew: How long Can You Keep It Before the Texture Degrades?
A big pot of stew is the ultimate cook-once, eat-twice meal. It’s perfect for busy weeknights or for packing up for a weekend at the cottage or a ski trip—a cherished Canadian tradition. But freezing can be tricky, as some ingredients don’t fare well. The main culprit is the potato. Standard starchy potatoes, when frozen and reheated, undergo a process called starch retrogradation, which causes them to become watery, grainy, and unpleasant.
The solution, once again, lies in choosing the right local ingredients. Waxy potatoes, like many varieties of red potatoes or the famed PEI Yukon Gold, hold their structure much better. Even better are other Canadian root vegetables. Turnips and rutabagas, particularly those from provinces like Prince Edward Island, are fantastic in stew and their texture remains perfectly firm and pleasant after freezing. A well-made stew featuring these robust vegetables can be frozen for up to 3 months without any significant degradation in quality.
Proper technique is also key to success. You must cool the stew completely before freezing it. Placing a hot container in the freezer creates steam, which turns into large ice crystals that damage the food’s texture. Portioning the cooled stew into airtight containers or reusable silicone bags makes for easy, single-serving meals. When you’re ready to eat, thaw it overnight in the fridge for the best results. A final tip from the chef’s kitchen: never freeze fresh herbs like parsley in the stew. Add them fresh after reheating to bring back a burst of bright, vibrant flavour.
Your Action Plan: The Canadian Cottage Weekend Freezing Guide
- Cool the stew completely at room temperature before placing it in the freezer to prevent large ice crystal formation.
- Portion the stew into reusable silicone bags or airtight containers, leaving about 1 inch of headspace for expansion.
- Label each container with the date and the type of meat and Canadian beer used for future flavour reference.
- Thaw the stew overnight in the refrigerator before reheating, or use the defrost setting on your microwave for a quicker meal.
- Add a handful of fresh, chopped herbs like parsley or chives only after reheating to restore brightness and flavour.
The Winter Pantry: What 5 Staples Should You Stock for Nordic Meals?
While we’re adapting an Irish classic, the spirit of the dish—a hearty, nourishing meal to fend off the cold—shares much with Nordic and northern-climate cooking. Building a pantry with a few key Canadian staples can elevate your stew from simple to sublime, adding layers of flavour that speak of our own cold-weather terroir. These are the secret weapons that add umami, texture, and a distinctly Canadian character.
First, consider dried mushrooms. Sourced from the forests of British Columbia or Quebec, a handful of rehydrated porcini or chanterelle mushrooms adds an incredible earthy depth and savoury umami that complements the rich meat. Next, think about grains and legumes. A small amount of Saskatchewan lentils or pot barley can be added to the stew to thicken it naturally and add a lovely, slightly chewy texture and nutty flavour. These are staples that have sustained Canadians through long winters for generations.
This display of Canadian ingredients illustrates the simple, powerful flavours we can draw upon.
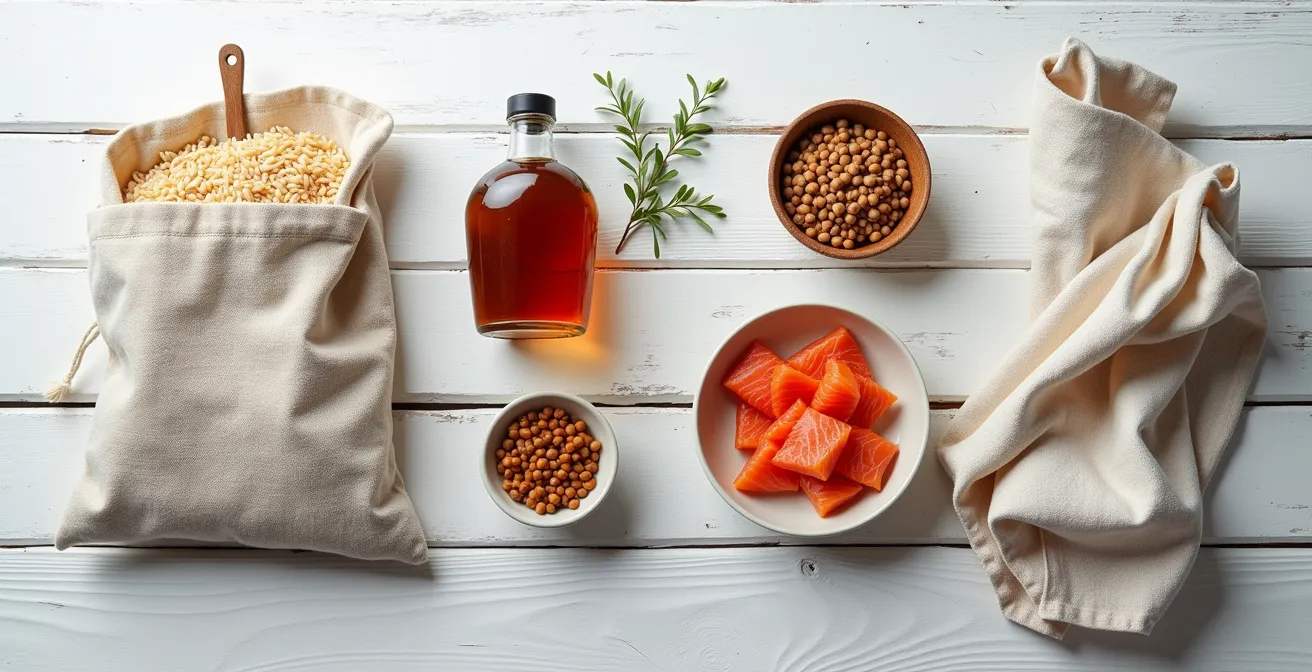
And let’s not forget the quintessential Canadian ingredient: maple syrup. Just a teaspoon added near the end of cooking won’t make the stew sweet, but it will round out the flavours, balancing the bitterness of the stout and the saltiness of the broth. Finally, having some high-quality smoked products on hand, like smoked salt or even a piece of smoked fish or bacon to render at the beginning, can infuse the entire dish with a subtle, rustic smokiness reminiscent of a wood fire. These five staples—dried mushrooms, lentils or barley, maple syrup, smoked salt, and Canadian wild rice—form the backbone of a truly Canadian winter pantry.
Kale vs. Cabbage: Which Green Adds More Vitamins to Your Colcannon?
No Irish stew is complete without a side of colcannon, the creamy, comforting mash of potatoes and greens. The traditional choices are cabbage or kale. Both are delicious, but when we’re thinking like a chef honouring local terroir, the question becomes: what grows well here, and how can we maximize flavour and nutrition? The debate isn’t just about taste; it’s also about how cooking affects the nutritional content of these greens.
Interestingly, while some water-soluble vitamins can be lost when greens are boiled, cooking can actually make other nutrients more available. According to research on cooked vegetables, the process helps break down tough cell walls, which can enhance our body’s ability to absorb fat-soluble vitamins like vitamins A and K. This means that lightly steaming or wilting your greens before folding them into the mash is a nutritionally sound practice.
This is where local Canadian greens can truly shine. Why stick to kale or cabbage when our provinces offer so many exciting alternatives? A chef’s experience often reveals these hidden gems. Laureen King from Art and the Kitchen, a Canadian food blog, highlights this exact point, advocating for the use of local greens to create a more dynamic and nutrient-rich colcannon.
Laureen King from Art and the Kitchen reports that using Ontario mustard greens or Manitoba beet tops in colcannon creates a more robust flavor profile than traditional kale or cabbage, while providing higher levels of Vitamin K and A. The peppery taste of local Canadian greens adds complexity that pairs beautifully with PEI Yukon Gold potatoes.
– Laureen King, Art and the Kitchen
The peppery bite of Ontario mustard greens or the earthy sweetness of Manitoba beet tops can transform a simple side dish into a conversation piece. These greens not only bring a more complex flavour profile that stands up beautifully to a rich stew, but they also offer a potent dose of vitamins. It’s a perfect example of how choosing local, seasonal ingredients can lead to a more delicious and nourishing meal.
Key takeaways
- Authenticity is in the principle, not the ingredient; use the science of slow-cooking to adapt Irish stew to Canadian terroir.
- Choose collagen-rich Canadian cuts like beef chuck or bison and pair them with regional craft stouts for a unique flavour profile.
- Control your temperature—a bare simmer is crucial for tender meat, especially with lean game. Never boil your stew.
Why Is Traditional Irish Soda Bread Better for Your Digestion Than Commercial Yeast Bread?
To complete our perfectly adapted Canadian-Irish meal, we need bread for sopping up that glorious stew. Traditional Irish soda bread is the perfect partner. Unlike commercial breads that rely on yeast, soda bread is a “quick bread” leavened by the chemical reaction between an acid (buttermilk) and a base (baking soda). This has a significant impact on its digestibility.
Yeast breads can sometimes cause digestive discomfort for people sensitive to yeast or the complex gluten structures that form during long fermentation. Soda bread, by contrast, is much simpler. The gluten is not extensively developed, resulting in a denser, more crumbly texture that many people find gentler on their system. This benefit can be further enhanced by making another Canadian substitution: using Canadian heritage flours.
Case Study: Canadian Heritage Grains and Digestibility
Modern wheat is bred for high gluten content, which is great for light, airy loaves but can be tough on some digestive systems. Heritage grains like Red Fife wheat, a variety that was developed in Canada, or spelt have different gluten structures. These flours create breads that are easier to digest. When used in a soda bread recipe, the result is a wholesome, flavourful loaf that is particularly gentle on the stomach, making it an excellent choice for a hearty meal like stew.
You can also adapt the other ingredients. If you don’t have buttermilk, you can make your own sour milk with Canadian dairy and a splash of vinegar. Or, for a probiotic boost, substitute with Canadian-made kefir. For a truly historic Canadian twist, you could even make bannock, another traditional quick bread. Embracing these local ingredients doesn’t just make your bread more digestible; it connects your meal to a deeper history of Canadian agriculture and baking.
- Use Canadian heritage flours like Red Fife or spelt for their unique flavour and better digestibility.
- Substitute buttermilk with Canadian kefir to add probiotics and a tangy flavour.
- Try making traditional Canadian bannock as a simple and delicious alternative quick bread.
- Add a portion of Canadian rye flour from the Prairies for a denser texture and deeper, earthier flavour.
The best way to master these principles is to get in the kitchen. Start by choosing your Canadian meat and a local stout, and begin your own culinary adaptation today. You have the knowledge to create a stew that is both a tribute to Irish tradition and a celebration of your own Canadian terroir.