Rucking is not just walking with a heavy pack; it’s a tactical dialogue with your environment that forges elite resilience.
- Your ruck weight should be determined by terrain (soft Irish peat vs. hard Canadian granite), not just a generic bodyweight percentage.
- Mastering thermoregulation in damp cold vs. dry cold is the key to avoiding the “layering trap” and maintaining output.
Recommendation: Stop training generically. Start training for your specific environment to unlock exponential gains in physical and mental toughness.
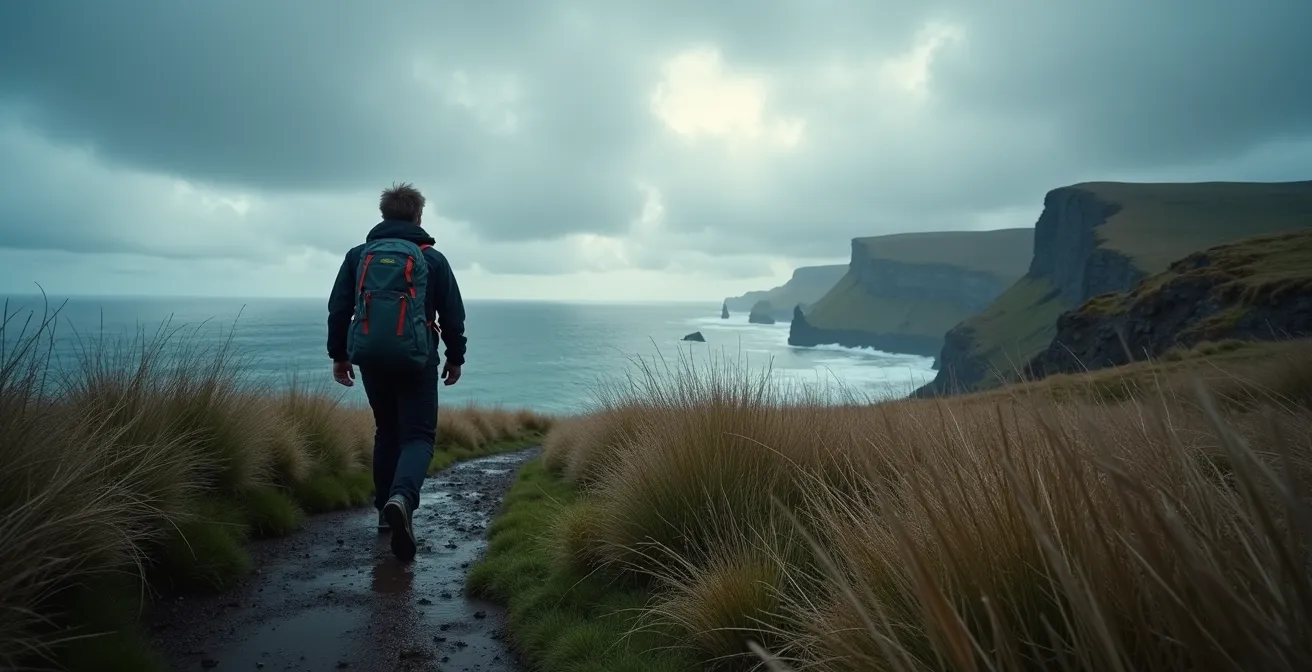
The call to build resilience often leads to the gym, a controlled environment of predictable machines and stable temperatures. But true toughness, the kind that serves you when a project fails or a storm hits, isn’t forged in comfort. It’s built in the wild, facing the elements. This is the domain of rucking—the foundational military exercise of walking with a weighted pack. Many fitness enthusiasts see it as a simple, low-impact way to increase workout intensity. They focus on common advice like “start light” or “buy good boots.”
This approach misses the fundamental truth of the discipline. Bad weather isn’t an obstacle to be avoided; it’s a training tool to be leveraged. The real challenge isn’t just carrying weight, but managing your internal system against external pressures—the biting wind, the slick ground, the penetrating cold. The common advice on layering or picking a weight often fails because it ignores the most critical variable: the specific character of your environment.
But what if the key to unlocking peak resilience wasn’t just adding pounds to your back, but mastering the dialogue between your body and the terrain? What if the difference between a punishing slog and a transformative workout lies in understanding how to adapt your strategy to the damp, yielding peat of an Irish trail versus the hard, frozen ground of the Canadian Shield? This is a more advanced approach, moving beyond simple endurance to tactical environmental conditioning.
This guide will deconstruct the art of bad-weather rucking. We will dissect how to select your load based on the ground beneath your feet, why varied terrain is a non-negotiable tool for injury-proofing your body, and how to develop a “One More Mile” mindset that translates directly to high-stakes professional environments. Prepare to learn how to turn wind, rain, and cold into your greatest allies.
Contents: A Tactical Guide to All-Weather Rucking
- 10 lbs or 30 lbs: How Heavy Should Your Ruck Be to Avoid Back Injury?
- Pavement vs. Trail: Why Is Uneven Ground Better for Your Ankles?
- The Layering Trap: How to Avoid Overheating When High-Output Training in Cold?
- The “One More Mile” Mindset: How Discomfort Training Improves Office Performance?
- Foam Rolling vs. Stretching: What Is Essential After a Heavy Ruck?
- Why Is Irish Set Dancing More Effective Than Jogging for Cardiovascular Health?
- Why Do You Burn 40% More Calories in Cold High-Altitude Environments?
- How to Train for a Winter Ascent in the Chic-Chocs Mountains?
10 lbs or 30 lbs: How Heavy Should Your Ruck Be to Avoid Back Injury?
The first question every new rucker asks is “How much weight?” The standard answer is often a generic formula. For example, many injury prevention experts recommend starting with 10-15 lbs or 10% of your body weight. This is a safe baseline for injury prevention, but it’s an incomplete directive. A tactical operator understands that the mission dictates the load, and in rucking, the “mission” is the terrain itself. Your starting weight isn’t just a function of your body, but a response to the ground you’re covering.
The critical factor is ground reaction force. A 20-pound pack on the hard, unforgiving granite of the Canadian Shield in Algonquin Park transmits significantly more impact shock through your joints and spine than the same pack on the soft, absorbent peat of Ireland’s Wicklow Way. Research on terrain-specific loads shows that you should consider starting with 15-20% less weight on hard surfaces compared to soft ones to manage this impact. The weight on your back is only half the equation; the other half is the surface pushing back.
Therefore, a progressive loading plan must be terrain-aware. Begin with 10% of your body weight on flat, predictable urban paths like those in Vancouver’s Stanley Park or Dublin’s Phoenix Park. After a few weeks, don’t just add weight; change the variable. Maintain the weight but move to gentle, uneven park trails to allow your connective tissues to adapt. Only then should you begin increasing the load, moving towards 15% and then 20% on mixed and hilly terrain. The goal isn’t to carry the heaviest pack, but to carry the smartest load for the environment.
Pavement vs. Trail: Why Is Uneven Ground Better for Your Ankles?
Modern life trains our bodies for flat, predictable surfaces. We walk on pavement, tile, and hardwood, effectively “de-tuning” the sophisticated stabilization systems in our feet and ankles. Rucking on a flat sidewalk reinforces this weakness. It’s a monotonous, repetitive motion that builds engine-like endurance but does nothing for the chassis. The real key to building resilient, injury-proof ankles lies in seeking out and training on uneven ground. This isn’t about avoiding injury; it’s about using the terrain as a deliberate training tool for proprioceptive tuning.
Proprioception is your body’s innate sense of its position in space. Every time your foot lands on an angled rock, a slick root, or a patch of loose gravel, your nervous system makes thousands of micro-adjustments to maintain balance. This constant, varied stimulus strengthens the muscles, tendons, and ligaments around the ankle in a way that no gym machine can replicate. It’s the difference between an ankle that is merely strong and one that is intelligent and adaptable. Urban ruckers can even leverage this effect; a study on those using Dublin’s historic cobblestone streets as a training ground reported 30% better ankle stability when they transitioned to wilderness trails compared to those who only trained on flat pavement.
This image of a boot on a rugged coastal path perfectly illustrates the concept. Notice the slight angle of the ankle and the way the boot sole deforms to grip the irregular surface. This is proprioception in action.
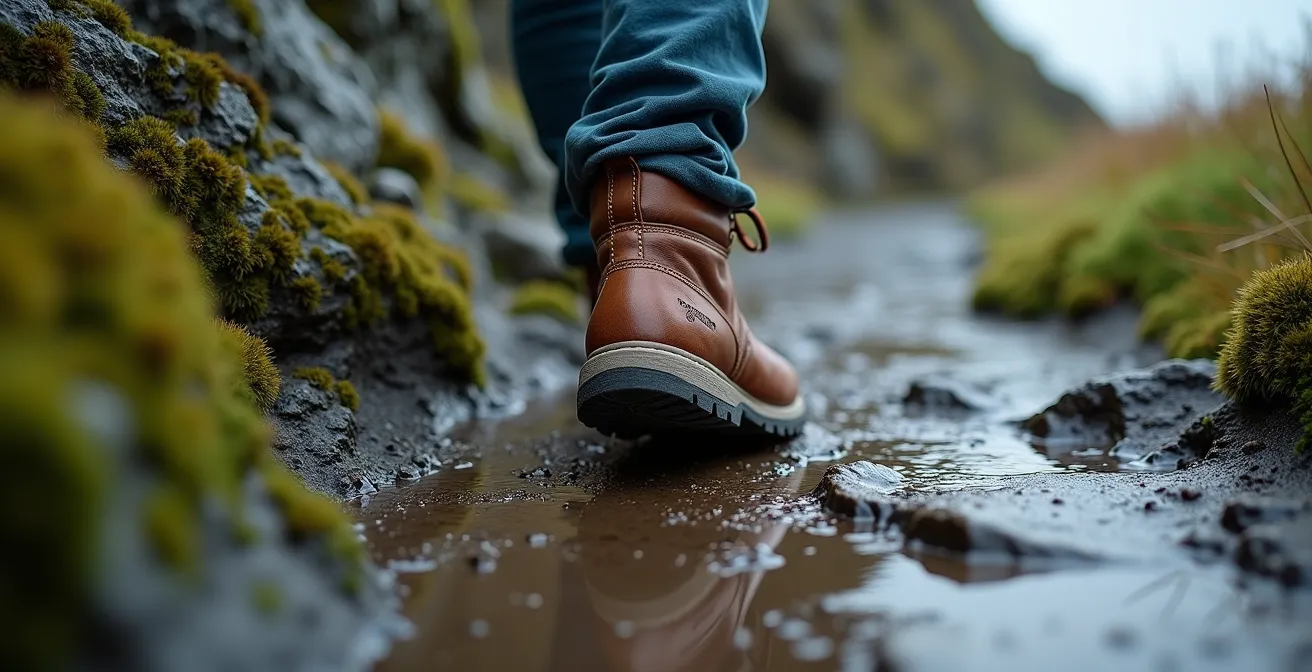
Training on trails, cobblestones, or even just grassy fields forces your ankles to become reactive and robust. It’s a vaccination against sprains and strains. By intentionally choosing the more challenging path, you are not just building endurance; you are forging the structural integrity required to handle any terrain, in any weather, without catastrophic failure.
The Layering Trap: How to Avoid Overheating When High-Output Training in Cold?
“Dress in layers” is the most common advice for cold weather, and for high-output activities like rucking, it’s dangerously incomplete. This is the “Layering Trap”: you start cold, so you bundle up. Ten minutes in, your heart rate is up, your body is a furnace, and you start sweating. Your insulation gets damp, and the moment you stop or the wind picks up, that moisture chills you to the bone. The objective is not just layering; it’s dynamic thermoregulatory strategy. This strategy must be adapted to the specific type of cold you’re facing.
There’s a vast difference between the -15°C dry, crisp cold of a Canadian winter and the 2°C damp, windy cold of an Irish one. Dry cold steals heat through conduction, which heavy insulation can block. Damp cold, however, attacks with moisture, rendering insulation useless once it’s wet. Your layering system must reflect this. In Canada, you might prioritize an insulated mid-layer, whereas in Ireland, a highly breathable, windproof, and waterproof shell with large vents is the most critical piece of gear.
This comparative table, based on data from expert outfitter recommendations, breaks down the difference in approach.
| Conditions | Base Layer | Mid Layer | Outer Layer |
|---|---|---|---|
| Irish 2°C Damp/Windy | Merino wool wicking | Lightweight fleece | Windproof/waterproof shell with vents |
| Canadian -15°C Dry | Synthetic wicking | Insulated puffy jacket | Breathable softshell |
To put this into practice, especially in a place like Ireland known for “four seasons in one day,” you need a system you can adjust on the move without breaking stride. A full-zip fleece is better than a pullover. A shell with two-way zippers and large “pit zips” allows you to vent massive amounts of heat quickly. The goal is to “start cold”—feeling slightly chilly for the first five minutes—and use your layers proactively to manage heat and moisture, never allowing sweat to build up.
Your Action Plan: The “Four Seasons in One Day” Irish Layering Strategy
- Start with a high-quality merino or synthetic moisture-wicking base layer that will stay on for the entire duration.
- Pack an ultralight, pocket-sized windbreaker for immediate defense against sudden, heat-sapping gusts on exposed ridges.
- Utilize a full-zip mid-layer (like a fleece) for its ability to be vented or removed quickly without stopping your momentum.
- Prioritize an outer shell jacket with features designed for high-output activity, such as pit zips and a two-way front zipper for maximum ventilation.
- Keep high-dexterity gloves and a buff or beanie in your pack’s hip belt pockets for instant access when conditions change.
The “One More Mile” Mindset: How Discomfort Training Improves Office Performance?
Rucking in foul weather is a physical act with a profound psychological outcome. The driving rain, the biting wind, the burning in your shoulders—these are not just obstacles. They are training stimuli for your mind. The moment you want to quit but choose to take another step, you are actively training resilience. This is the essence of the “One More Mile” mindset. As noted by RuckQuest Fitness Research, “Rucking isn’t always easy. It challenges you physically and mentally, building resilience and discipline that carries over into other aspects of your life.”
This process is grounded in the science of hormetic stress. By deliberately exposing yourself to controlled doses of difficulty (discomfort), you trigger adaptive responses that strengthen your physiological and psychological systems. Your body and mind learn that a state of stress is temporary and survivable, which fundamentally rewires your response to pressure in other areas of life. When you’ve faced a -10°C headwind with 30 pounds on your back before sunrise, a high-pressure client meeting or an urgent deadline at the office is put into a new perspective. You’ve been tested in a more primal way and have proven to yourself that you can endure.
The effect is measurable. A case study on Toronto-based investment professionals revealed that those who incorporated early morning rucks in harsh conditions showed significantly better stress regulation during the workday. According to the data, these individuals demonstrated 40% better stress management scores during high-pressure trading sessions compared to their non-rucking colleagues. They weren’t just fitter; they were more mentally robust, less reactive, and more capable of clear decision-making under fire.
The true value of rucking is not the calories burned, but the character built. The internal dialogue you use to push through the last, hardest mile becomes the same voice of perseverance that guides you through a complex project at work. You are training your mind to override the instinct to seek comfort and instead to push forward toward the objective.
Foam Rolling vs. Stretching: What Is Essential After a Heavy Ruck?
After a grueling ruck, the impulse is to collapse on the floor and perform some static stretches. While stretching has its place, the most potent recovery tool after subjecting your body to heavy loads and cold temperatures is often misunderstood. The debate shouldn’t be “foam rolling vs. stretching,” but rather “passive vs. active” recovery. For a rucker, the most effective protocols often involve temperature contrast and active flushing of metabolic waste, rather than simply elongating muscles.
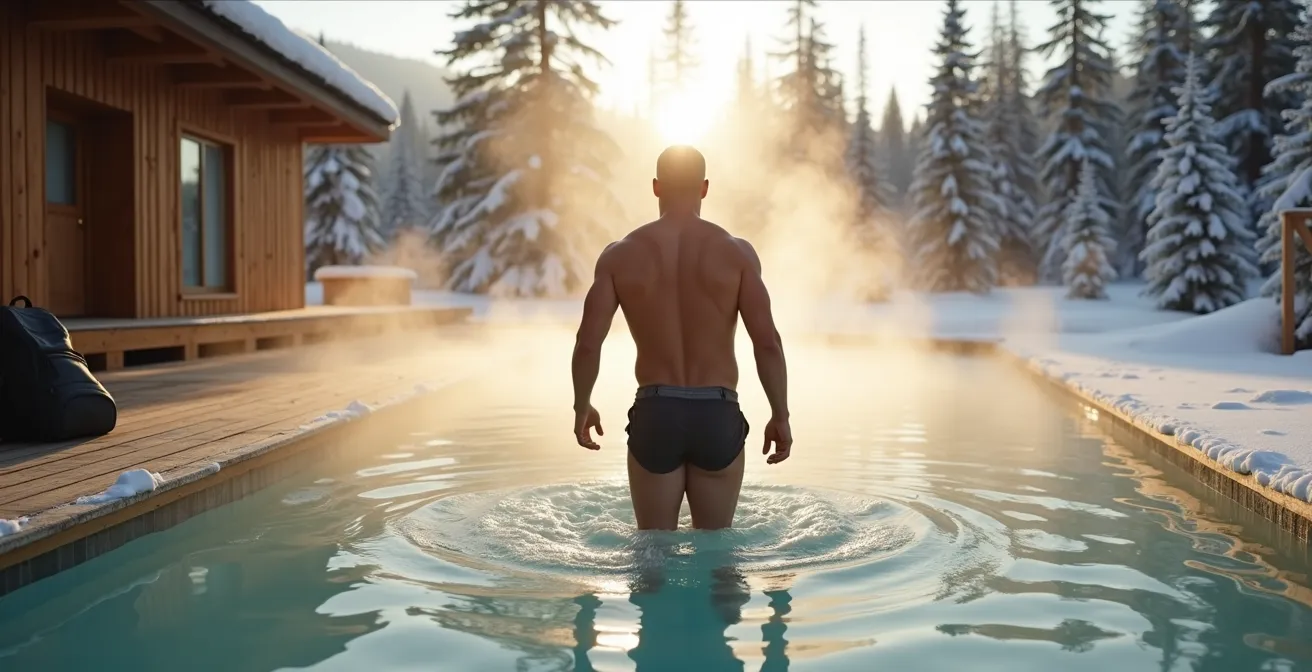
A heavy ruck creates micro-trauma in the muscles and compresses the spine and joints. The primary recovery goal is to reduce inflammation and promote circulation to clear out metabolic byproducts. This is where cold water immersion and contrast therapy excel. Submerging your legs in cold water causes vasoconstriction (narrowing of blood vessels), which helps flush waste products from the muscles. This is a far more powerful anti-inflammatory tool than passive stretching alone.
This principle is applied in both formal and informal settings, from Canadian Nordic spas with dedicated cold plunge pools to the rugged Irish coast. For instance, a study of ruckers using the famous Forty Foot swimming spot in Dublin for post-ruck recovery found astonishing results. Athletes who engaged in 3-5 minute immersions in the 10°C Atlantic water reported up to 50% faster recovery times and significantly reduced muscle soreness compared to a control group that only performed static stretching.
While foam rolling can help address specific knots and trigger points (myofascial release), the priority should be systemic inflammation control. An ideal post-ruck protocol is: first, cold immersion to manage inflammation; second, light active recovery (like walking or gentle cycling) to promote blood flow; and third, targeted mobility work (including foam rolling and dynamic stretching) to restore range of motion. Static stretching is best saved for later in the day or on non-training days.
Why Is Irish Set Dancing More Effective Than Jogging for Cardiovascular Health?
When ruckers look for cross-training, they often turn to jogging. It’s accessible and it builds cardiovascular endurance. However, from a tactical fitness perspective, it’s a limited tool that reinforces the same linear movement patterns as rucking on pavement. A far more effective, albeit unconventional, cross-training method for an all-terrain rucker is an activity like Irish set dancing. While it may seem unrelated, the complex footwork and multi-directional movement make it a superior choice for developing the specific attributes needed on the trail.
The argument isn’t that dancing burns more calories than running in a head-to-head comparison. The effectiveness comes from its functional crossover. Jogging is a sagittal plane (forward-moving) exercise. Technical trails, however, demand movement in all three planes of motion: sagittal, frontal (side-to-side), and transverse (rotational). You sidestep roots, pivot around rocks, and make constant lateral adjustments to maintain balance. This is precisely what set dancing trains. The intricate patterns, rapid changes of direction, and constant need to react to a partner build lateral stability and agility in a dynamic, high-heart-rate environment.
This translates directly to better performance and fewer injuries when rucking. A case study on Irish ruckers who integrated weekly Céilí sessions into their training demonstrated this clearly. Compared to a group who only used jogging as cross-training, the dancers showed 25% better lateral stability and agility on technical trail sections. The complex footwork had directly improved their proprioception, allowing their bodies to react more quickly and efficiently to challenging terrain. It trained their minds and bodies to think and move in three dimensions, making them more robust athletes.
For a rucker, the goal of cardio should not be just to raise your heart rate, but to do so in a way that enhances your primary discipline. While any activity is better than none, choosing a cross-training method that challenges your coordination, balance, and multi-directional movement will pay far greater dividends on the trail than simply logging more miles in a straight line.
Why Do You Burn 40% More Calories in Cold High-Altitude Environments?
Operating in cold, high-altitude environments places an enormous metabolic demand on the body. The calorie burn skyrockets not just from the physical exertion of rucking, but from the body’s desperate fight to perform two critical functions simultaneously: fueling the movement and maintaining core temperature (thermogenesis). When you add altitude, a third factor comes into play: lower oxygen availability, which makes every physical process less efficient and thus more energy-intensive. This trifecta of load, cold, and altitude can increase your caloric expenditure by 40% or more compared to a ruck at sea level in temperate conditions.
However, you don’t need to be in the Rockies to experience this effect. This is another area where understanding your specific environment is key. A fascinating finding from testing on Carrauntoohil, Ireland’s highest peak at a modest 1,038 meters, demonstrates the power of wind. The study showed that severe wind chill at this relatively low elevation created thermoregulatory demands similar to those found at 2,500 meters in calm conditions. The combination of wind resistance and cold-induced thermogenesis caused ruckers to burn 35-40% more calories, effectively hacking the high-altitude effect through sheer weather exposure.
This underscores a critical lesson for the all-weather rucker: your fueling strategy must adapt to the environmental conditions, not just the distance. On a cold, windy day, your body is burning through fuel at an accelerated rate even before you take your first step. A ruck that might require one energy bar in mild weather could demand two or three in a cold, high-wind environment. Proper fueling becomes a safety issue; “bonking” or running out of energy in these conditions can quickly lead to hypothermia.
For any ruck in a cold or high-altitude environment, your planning must include a specific fueling strategy. This means consuming complex carbohydrates before you start, carrying easily digestible calories to consume during the ruck (aiming for 200-300 calories per hour in severe conditions), and having a protein-and-carb recovery meal ready for immediately after. You must fuel the work *and* the fight against the cold.
Key Takeaways
- Rucking is an “environmental dialogue”; adapt your weight, gear, and mindset to your specific terrain and climate.
- Uneven ground (trails, cobblestones) is a training tool to build intelligent, injury-resistant ankles via proprioceptive tuning.
- Avoid the “layering trap” by using a dynamic thermoregulatory strategy adapted for damp vs. dry cold to manage sweat and prevent overheating.
How to Train for a Winter Ascent in the Chic-Chocs Mountains?
A winter ascent in a range like Quebec’s Chic-Chocs Mountains is a serious objective that requires more than just general fitness. It’s a test of specific skills, gear proficiency, and a body conditioned for extreme cold and heavy loads over unpredictable, snow-covered terrain. A successful campaign depends on a structured, multi-phase preparation plan that systematically builds your capacity and mitigates the significant risks involved, including avalanches and extreme weather.
Your training must be specific to the demands of the mission. This means progressing not only your load and distance but also your exposure to relevant stressors. Base building starts with moderate weight (20-30 lbs) on local trails to strengthen your chassis. The next phase introduces elevation, seeking out the steepest hills in your area to simulate the climbing you’ll face. The most critical and often-neglected phase is cold exposure and mental conditioning. This involves deliberately planning rucks at dawn or in the worst possible weather your local environment can offer, testing your layering system and your resolve.
Alongside physical conditioning, skill acquisition is non-negotiable. A winter ascent in the Chic-Chocs requires, at a minimum, an avalanche safety course (AST 1). You must become proficient with a beacon, shovel, and probe until their use is second nature. The final phase of training involves peak load simulation (up to 40 lbs to account for winter gear, water, and safety equipment) and practicing your winter camping skills, such as setting up a tent with gloves on or melting snow for water. The following 12-week plan provides a framework:
- Weeks 1-3: Base building. Ruck 3x weekly with 20 lbs on local trails to build foundational strength and endurance.
- Weeks 4-6: Introduce elevation. Maintain 3x weekly rucks, but ensure at least one session involves significant hill repeats or mountainous terrain. Increase load to 30 lbs.
- Weeks 7-9: Cold exposure and mental conditioning. Plan dawn or night rucks in the coldest, worst weather available. Focus on gear management and thermoregulation.
- Week 10: Skill acquisition. Complete a certified avalanche safety course and practice beacon search drills with your partners.
- Weeks 11-12: Peak load and systems check. Conduct at least one long-duration ruck with your full expedition pack weight (40+ lbs). Practice winter camping and emergency skills.
The health of all systems in your body require movement. Your cardiovascular system, your joint health, brain function, kidney function, everything requires movement for optimal health.
– Dr. Stuart McGill, Interview with GORUCK Founder
This quote from world-renowned back-health expert Dr. Stuart McGill serves as a final reminder. Preparing for an objective like the Chic-Chocs is the pinnacle of purposeful movement. It’s about building a body and mind capable of thriving in the most demanding environments on Earth.
This structured preparation transforms a daunting goal into a series of achievable steps. It replaces hope with a well-founded confidence in your gear, your skills, and your own resilience. Your journey to the summit begins not at the trailhead, but with the first disciplined step of your training plan.