Transforming colcannon into a complete, budget-friendly meal isn’t about finding one cheap recipe; it’s about adopting a food system where nothing is wasted.
- Strategic ingredient choices (like kale for nutrients or cabbage for cost) form the foundation.
- Proper cooking techniques preserve texture and value, while leftovers become entirely new meals like breakfast cakes.
- Topping the colcannon with a homemade, slow-cooked Canadian beef stew makes it a protein-rich, complete dish.
Recommendation: Start by mastering the perfect mashed potato base, then build upon it with protein toppings and zero-waste strategies to maximize every dollar and nutrient.
For students and families navigating tight budgets in places like Canada, the challenge of creating meals that are both comforting and nutritionally complete can feel relentless. The search for budget-friendly options often leads to repetitive, less-than-inspiring dishes. We’re told to buy in bulk or simply add cheap protein, but these tips rarely address the core issue: how to build a truly satisfying meal system without breaking the bank. Traditional dishes like Irish colcannon—a simple mix of mashed potatoes and greens—are often dismissed as mere side dishes, quaint but incomplete.
But what if this humble dish holds the secret to an entire economic food strategy? The key isn’t just to make colcannon, but to see it as a versatile and affordable “platform.” This approach moves beyond a single recipe and focuses on a cycle of creation: making a delicious base, enriching it with smart protein choices, and transforming every leftover into a new, valuable meal. This isn’t about cutting corners; it’s about smart culinary engineering to create abundance from simplicity.
This guide will walk you through the practical steps to elevate colcannon from a side dish to the star of a complete, balanced meal for under three dollars a serving. We will explore the nutritional trade-offs of its core ingredients, master the techniques that prevent waste, and learn how to create protein-rich toppings using affordable, local Canadian ingredients. Prepare to rethink what’s possible with a bag of potatoes and a little bit of strategy.
This article breaks down the entire process, from ingredient selection to leftover transformation. Follow along to master each step of building your new favorite budget-friendly comfort food system.
Summary: The Complete Guide to Budget-Friendly Colcannon Meals
- Kale vs. Cabbage: Which Green Adds More Vitamins to Your Colcannon?
- How to Mash Potatoes Without Creating a Gluey Texture?
- Butter vs. Plant-Based Oil: Which Substitute Mimics the Traditional Taste Best?
- The Reheating Mistake That Dries Out Leftover Colcannon
- Colcannon Cakes: How to Repurpose Leftovers for a Savory Breakfast?
- Sauerkraut vs. Kimchi: Which Fermented Food Is Easier to Make at Home?
- Freezing Stew: How long Can You Keep It Before the Texture Degrades?
- How to Adapt Traditional Irish Stew Using Local Canadian Ingredients?
Kale vs. Cabbage: Which Green Adds More Vitamins to Your Colcannon?
The first decision in building your colcannon platform is choosing the green. This choice isn’t just about tradition; it’s a strategic nutritional and economic arbitrage. Both kale and cabbage are excellent, but they serve different purposes. Your choice depends on whether your priority is maximizing vitamin intake or minimizing cost.
Kale is the undisputed nutritional powerhouse. If you’re looking to boost the health profile of your meal, kale is the winner. According to nutritional data, kale contains a staggering 139 times more vitamin A than cabbage, a crucial nutrient for immune function and vision. It is also an excellent source of Vitamin K, calcium, and potassium. This makes kale the ideal choice for turning colcannon into a more nutrient-dense meal, especially if other vitamin sources are limited in your diet.
Cabbage, on the other hand, is the champion of frugality. It’s typically much cheaper per pound than kale and offers a softer, more traditional texture. While it can’t compete with kale on most vitamin fronts, it is still a respectable source of vitamin C and dietary fiber. Both greens contribute to making the colcannon more filling, which is essential for a satisfying meal on a budget. This table offers a clear comparison of their key nutrients per 100g.
This comparison shows the clear trade-off between the two greens. Kale provides a significant nutritional boost, while cabbage delivers on budget-friendliness.
| Nutrient | Kale | Cabbage |
|---|---|---|
| Vitamin C | 93.4mg | 36.6mg |
| Vitamin A | 241ug | 5ug |
| Calcium | 254mg | 40mg |
| Fiber | High | High |
Ultimately, the best strategy might be a hybrid one: use cabbage as your staple for its low cost and supplement with kale when it’s on sale to get the best of both worlds. This practical approach ensures your colcannon is always affordable, yet nutritionally optimized whenever possible. A family-sized batch could even use a mix of both to balance cost and nutrition perfectly.
How to Mash Potatoes Without Creating a Gluey Texture?
The foundation of any great colcannon is perfectly fluffy mashed potatoes. Get this wrong, and you end up with a sticky, gluey paste that no amount of butter or cabbage can save. This isn’t just a matter of taste; a poor texture can lead to food waste, directly undermining our goal of a sub-$3 meal. The secret lies in understanding potato starch and handling it with care.
The primary culprit behind gluey potatoes is overworking them. Aggressive mashing, especially with a food processor or blender, ruptures the potato’s starch cells. When these cells break, they release an excess of sticky starch, creating that undesirable wallpaper-paste consistency. To avoid this, you must treat the potatoes gently. The goal is to break them apart just enough to create a mash, without pulverizing them. High-starch potatoes like Russets or Yukon Golds are your best allies here, as their floury texture is naturally inclined to become fluffy.
Using the right tool is half the battle. A potato ricer or a food mill is the gold standard. These tools press the cooked potato through small holes, creating fine, light strands without the shearing action of a blade or mixer. This results in the fluffiest possible texture. Another critical step is to warm your dairy ingredients (milk, cream, or butter) before adding them. Cold liquids will shock the potatoes, making them harder to incorporate and tempting you to over-mix.
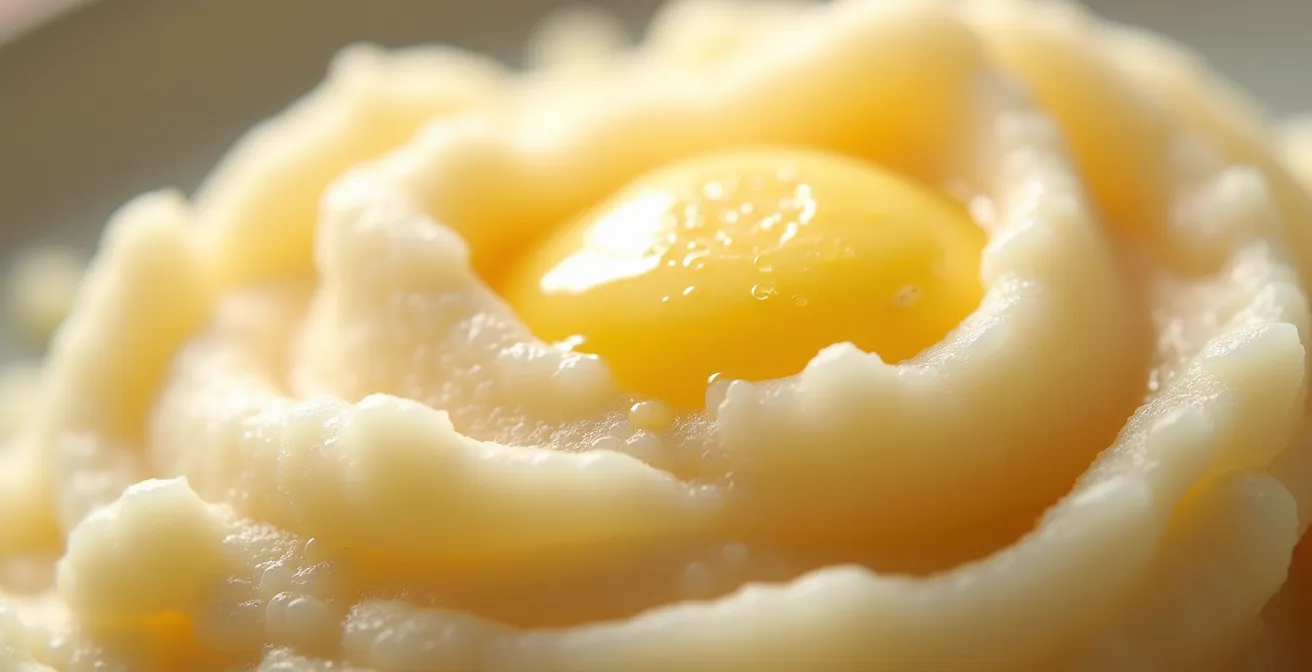
As the image above illustrates, the ideal texture is light and airy, with visible structure, not a uniform paste. This is the result of gentle handling and respecting the integrity of the potato starch. Stop mashing as soon as the lumps are gone. A few small, rustic lumps are far better than a gluey, overworked mash. Mastering this technique ensures your colcannon base is delicious and that none of your investment in ingredients goes to waste.
Butter vs. Plant-Based Oil: Which Substitute Mimics the Traditional Taste Best?
Once your potatoes are perfectly mashed, the next step is adding richness. Traditionally, this means a generous amount of butter. However, for a budget-conscious household, butter can be one of the most expensive ingredients in the recipe. This forces another strategic decision: stick with tradition for flavor, or pivot to a more economical plant-based oil? The answer lies in using both, but strategically.
Butter’s delicious, creamy flavor is hard to replicate, but it’s not always the best choice for cooking. It has a significantly lower smoke point than most plant oils, typically between 302-350°F, compared to over 400°F for many oils. This means if you use it to sauté your kale or cabbage, it’s likely to burn, creating off-flavors. From an economic and culinary standpoint, it makes more sense to use a cheaper, high-smoke-point oil for the initial cooking and reserve a small amount of butter for finishing. Stirring a pat of butter into the colcannon at the very end will deliver that traditional creamy flavor without waste.
So, how do you build that rich, umami flavor without relying on expensive butter? The key is to build flavor layers with cheaper ingredients. Deeply browning your onions or leeks in a neutral oil like canola or refined coconut oil creates a sweet, savory base. For an extra “cheesy” or nutty flavor that mimics butter’s richness, a spoonful of nutritional yeast is an incredibly effective and affordable secret weapon. This approach treats butter not as a primary cooking fat, but as a high-impact finishing condiment, allowing you to use far less while still achieving a delicious result. This is smart budget cooking in action.
Another excellent, though more involved, option is to use clarified butter, also known as ghee. It’s a better cooking fat than whole butter because the milk solids have been removed, giving it a much higher smoke point. While it can be pricey to buy, you can make it at home from regular butter to stretch its value. By reserving butter for its flavor impact and using cheaper alternatives for cooking, you can stay on budget without sacrificing taste.
The Reheating Mistake That Dries Out Leftover Colcannon
Making a large batch of colcannon is a fantastic budget strategy, but only if the leftovers are just as good as the first serving. The most common mistake is reheating it in the microwave. While fast, microwaving tends to heat unevenly and zap moisture, leaving you with a dish that’s dry in some spots and pasty in others. This can turn a delicious meal into a disappointing one, leading to food waste and negating your cost-saving efforts.
The best way to preserve the creamy texture of your colcannon is to reheat it gently on the stovetop. Simply add your desired portion to a small saucepan or skillet with a splash of milk, broth, or a small pat of butter. Heat it over low to medium-low heat, stirring occasionally, until it’s warmed through. This method allows the moisture to be reabsorbed slowly, restoring the dish to its original creamy glory. It takes a few more minutes than a microwave, but the payoff in texture and taste is immense, protecting your initial investment of time and money.
Another fantastic method is to embrace a new texture entirely. Instead of trying to recreate the mash, you can pan-fry the leftovers in a little oil until a crispy, golden-brown crust forms. This “bubble and squeak” style creates a delightful contrast between the crunchy exterior and the soft, creamy interior. It feels like an entirely new dish, which is a great way to combat leftover fatigue. Proper storage is, of course, essential. Always store your colcannon in an airtight container in the refrigerator, where it will keep for up to 4 days.
Action plan: Storing and Reheating Colcannon for Maximum Value
- Portioning: After cooking, immediately divide leftovers into single-serving airtight containers. This prevents multiple reheatings of the main batch.
- Refrigeration and Freezing: Store in the refrigerator for up to 4 days for immediate use. For longer-term storage, freeze individual portions for instant budget meals later.
- Thawing Protocol: If frozen, always thaw portions overnight in the refrigerator before reheating. Thawing at room temperature or in the microwave will compromise the texture.
- Moisture Addition: When reheating on the stovetop, assess the dryness. Add a splash of warm broth, milk, or a small amount of butter to restore creaminess and flavor.
- Texture Transformation: For variety, inventory your leftovers. Plan to pan-fry at least one portion into a crispy “bubble and squeak” to create a new meal experience and prevent food waste.
By following these simple guidelines, you ensure that every single serving of colcannon you make is eaten and enjoyed. This zero-waste approach is fundamental to keeping your cost per serving truly under that three-dollar target.
Colcannon Cakes: How to Repurpose Leftovers for a Savory Breakfast?
The true genius of the colcannon platform lies in its ability to transform. Leftovers aren’t just a repeat of last night’s dinner; they are the raw material for an entirely new meal. The most effective and delicious transformation is turning leftover colcannon into savory breakfast cakes. This not only eliminates food waste but also creates a hearty, protein-rich breakfast that costs pennies to make.
The process is incredibly simple. Take your cold, leftover colcannon and mix in a binding agent. To make it a complete protein meal, add one egg and, for extra fiber and protein, a handful of mashed chickpeas or white beans. This mixture adds structure and a significant nutritional boost. Shape the mixture into small, thick patties. From there, you can pan-fry them in a little oil until they are golden brown and crispy on both sides. The result is a savory pancake, similar to an Irish “Bubble and Squeak,” but fortified for a complete breakfast.
To elevate it further, serve the colcannon cake topped with a sunny-side-up or poached egg. The runny yolk creates a natural, rich sauce that complements the crispy potato and soft greens perfectly. This single addition turns a simple leftover into a café-quality breakfast that is both incredibly satisfying and astonishingly cheap. You have successfully taken the components of one meal and spun them into a second, distinct, and highly nutritious one. This is the “zero-waste loop” in its most delicious form.

This simple act of repurposing embodies the spirit of an economist. It’s about seeing the hidden value in what you already have and maximizing its potential. A bowl of leftover potatoes becomes an opportunity for a warm, savory start to the day, ensuring no food and no money is ever wasted.
Sauerkraut vs. Kimchi: Which Fermented Food Is Easier to Make at Home?
To truly embrace a zero-waste kitchen, we can go one step further. When you prepare your colcannon, you’ll often have leftover cabbage, especially the tougher outer leaves or the core. Instead of composting them, you can use them to make a delicious, gut-healthy topping: homemade sauerkraut. While other fermented foods like kimchi are wonderful, sauerkraut is significantly easier and cheaper to make at home, requiring only two ingredients: cabbage and salt.
Making sauerkraut is a simple process of lacto-fermentation. All you need to do is finely shred your leftover cabbage, weigh it, and then add 2% of that weight in salt. For example, for 500 grams of cabbage, you would use 10 grams of salt. Massage the salt into the cabbage for several minutes until it starts to release its own liquid. This natural brine is all that’s needed; no water should be added. Pack the salted cabbage tightly into a clean glass jar, pressing it down so the brine rises to cover it completely.
Cover the jar with a cloth secured with a rubber band and let it sit at room temperature for anywhere from 3 to 7 days, or longer if you prefer a more sour taste. This process creates a tangy, probiotic-rich condiment for pennies. This homemade sauerkraut serves as the perfect acidic complement to the rich, creamy colcannon. A spoonful on top cuts through the richness of the potatoes and butter, adding a layer of bright, complex flavor that elevates the entire dish. It’s a simple trick that brings restaurant-quality complexity to a humble meal.
This practice establishes a perfect zero-waste cooking loop. The “waste” from one meal’s preparation becomes a high-value ingredient for the next. You’ve not only saved money by using every part of the cabbage, but you’ve also created a healthy, flavorful topping that makes your main dish even more delicious. This is the essence of turning a simple recipe into a sustainable food system.
Freezing Stew: How long Can You Keep It Before the Texture Degrades?
While colcannon is wonderfully filling on its own, adding a protein-rich topping is what truly transforms it into a complete, balanced meal. A slow-cooked stew is the perfect partner, but making it fresh every time isn’t practical or economical. The solution is to make a large batch of stew and freeze it in perfect, single-serving portions. However, freezing can affect texture, so it’s important to do it right.
Generally, meat and vegetable stews freeze very well. For optimal quality, it’s best to consume them within a specific timeframe. Most sources agree that stews can be stored frozen for up to 3 months before you might notice a degradation in texture and flavor. To prevent freezer burn, which dries out the food, it’s crucial to cool the stew completely before freezing and to use airtight containers or freezer bags with as much air removed as possible. A thin layer of fat on top of the stew before freezing can also act as a protective barrier.
A game-changing technique for portioning is the “gravy bomb” method. Instead of freezing large blocks of stew, pour your finished (and cooled) stew or its rich gravy into ice cube trays. Once frozen solid, transfer these “bombs” into a labeled freezer bag. When you’re ready to eat, you can simply heat a serving of colcannon and drop 2-3 gravy bombs on top. They will melt into a perfect, flavorful, and protein-rich sauce, instantly creating a complete meal. This method gives you incredible portion control and makes weeknight meals effortless.
It’s worth noting that certain vegetables hold up better than others. Root vegetables like carrots, parsnips, and turnips freeze well, maintaining a pleasant texture. Potatoes, however, can become grainy and mealy after freezing. Since your colcannon already provides the potato element, it’s best to make your freezable stew with other vegetables to ensure the best possible result when you reheat it.
Key takeaways
- Colcannon is a versatile “platform,” not just a side dish, for building budget-friendly meals.
- Strategic ingredient choices (kale for nutrients, cabbage for cost) and proper cooking techniques (gentle mashing) are crucial for value.
- A zero-waste approach, where leftovers are transformed into new meals like breakfast cakes and scraps become sauerkraut, maximizes every dollar.
How to Adapt Traditional Irish Stew Using Local Canadian Ingredients?
The final piece of our colcannon meal system is the protein topping. A traditional Irish stew, rich with lamb, is the classic pairing. However, lamb can be prohibitively expensive in Canada, pushing the meal well over our $3 budget. The solution is a “Canadian-Irish fusion” stew, adapting the traditional recipe with affordable, local ingredients to create the perfect, hearty colcannon companion.
The most significant substitution is the meat. Instead of pricey lamb shoulder, opt for Canadian chuck beef or pork shoulder. These cuts are significantly cheaper, full of flavor, and become incredibly tender when slow-cooked. Similarly, expensive imported stouts like Guinness can be replaced with any local dark beer or even a rich beef broth to provide that deep, malty flavor base. This is a great side dish to accompany meats, casseroles, or stews, and this adaptation makes it possible on a tight budget.
The vegetable components can also be localized. While carrots are common in both cuisines, traditional Irish stew often uses leeks. In Canada, yellow onions are a much more affordable and readily available alternative that provides a similar aromatic foundation. You can also bulk up the stew with hardy, inexpensive Canadian root vegetables like parsnips and turnips, which add sweetness and texture. For a uniquely Canadian twist, a hint of maple syrup can be added at the end to balance the savory notes of the stew, creating a complex flavor profile that pairs beautifully with the creamy colcannon.
This table illustrates the significant cost savings achieved by substituting traditional Irish ingredients with their Canadian counterparts. The prices are illustrative but reflect a typical difference in cost.
| Irish Traditional | Canadian Substitute | Cost/lb (Illustrative) |
|---|---|---|
| Lamb shoulder | Chuck beef | $6.99 vs. $3.99 |
| Guinness | Local dark beer | $4.00 vs. $2.50 |
| Leeks | Yellow onions | $2.99 vs. $0.99 |
| Carrots | Parsnips/Turnips | $1.29 vs. $1.49 |
By making these smart, localized substitutions, you can create a large batch of incredibly flavorful stew that respects both Irish tradition and your Canadian budget. Once prepared and frozen in portions, it becomes the on-demand protein component that completes your colcannon meal, ensuring it is always balanced, satisfying, and affordable.
By viewing colcannon as a flexible platform and applying these strategies, you can consistently create meals that are not only under budget but also nutritious, comforting, and delicious. The next step is to get into the kitchen and start building your own economical food system, one perfect batch of colcannon at a time.