
Contrary to what you see on social media, safe cold water dipping isn’t about mental toughness or enduring misery; it’s about mastering your body’s involuntary physiological responses.
- The most critical dangers, like the “gasp reflex” and “after-drop,” are predictable and manageable with specific techniques.
- A structured acclimatization plan, starting with cold showers, is non-negotiable for training your nervous system before entering the Atlantic.
- The buddy system is a formal safety protocol, not just a casual swim with a friend.
Recommendation: Before your first dip, focus on one thing: learning to control your breath during the first 60 seconds of cold exposure. This single skill is the foundation of all safety.
You’ve seen the videos: people smashing through ice, emerging from the frigid Atlantic with a triumphant roar, and claiming life-changing benefits. The allure is powerful, but a primal voice in your head screams, “This is how you get a heart attack.” As a cold water instructor and a rescuer who has seen things go wrong, I’m here to tell you that voice is right to be cautious. The cold is a powerful, unforgiving force. But it is also a righteous teacher if you approach it with respect and knowledge, not just bravado.
Most guides will give you generic advice: “start slow,” “breathe,” “listen to your body.” This is dangerously vague. True safety doesn’t come from vague encouragement; it comes from understanding the precise physiological events happening in your body and having a concrete protocol to manage them. Forget the idea of “toughing it out.” This isn’t about enduring pain. It’s about gaining control over your own survival mechanisms, from the initial shock of the gasp reflex to the hidden dangers of warming up too quickly.
This guide is different. We won’t just tell you *what* to do; we will explain *why* you’re doing it, from a rescuer’s perspective. We’ll dismantle the process, turning your fear into a calculated respect. We will cover the specific dangers of the open Atlantic, the gear that actually matters for safety, the correct way to build up your tolerance, and the non-negotiable rules for never getting into trouble. By the end, you won’t just be ready to dip; you’ll be a safer, smarter, and more resilient practitioner.
This article provides a structured path from absolute beginner to confident dipper. Follow these sections to build your knowledge and your safety protocols step-by-step.
Summary: A Rescuer’s Framework for Safe Atlantic Dips
- The “After-Drop” Danger: Why You Feel Colder 10 Minutes After Getting Out?
- Neoprene Booties: Are They Cheating or Essential for Safety?
- Cold Showers vs. Ice Baths: Which Is More Effective for Immune System Support?
- 2 Minutes or 10 Minutes: How Long Before Cold Exposure Becomes Damaging?
- The Buddy System: Why You Should Never Dip Alone in Open Water?
- Why Is the “Gasp Reflex” the Real Killer in Cold Water Kayaking?
- The “It’s Too Cold” Excuse: How to Build the Mental Resilience to Go Outside?
- How to Start “Rucking” (Weighted Walking) to Build Resilience in Bad Weather?
The “After-Drop” Danger: Why You Feel Colder 10 Minutes After Getting Out?
The paradox of cold water dipping is that the most dangerous moment can happen after you’re already on shore, wrapped in a towel. You feel fine, even invigorated, and then ten minutes later, you start shivering uncontrollably. This is the “after-drop,” and it’s a critical concept to master. While you are in the cold water, your body cleverly performs vasoconstriction: it narrows the blood vessels in your skin and extremities to keep your warm blood protecting your vital organs. You are essentially creating a “cold shell” around your warm core.
The moment you get out, your body thinks the danger is over and starts to re-establish normal circulation. This is vasodilation. It sends warm blood back out to your cold skin and limbs. But as this warm blood reaches your extremities, it cools down rapidly. This newly cooled blood then circulates back to your core, causing your core body temperature to plummet. This is the after-drop, and it’s when hypothermia can set in, even when you’re fully dressed. It’s not a sign of failure; it’s a predictable physiological event.
Managing the after-drop isn’t about finding the warmest blanket. It’s about a swift, disciplined exit protocol designed to minimize core temperature loss and start generating internal heat. Your goal is to get out of wet clothes and into dry, windproof layers as fast as humanly possible, ideally under 60 seconds. Then, you must actively generate your own heat through movement and fuel your internal furnace with a warm, sugary drink. Passively waiting to “warm up” is a recipe for a dangerous and prolonged shiver.
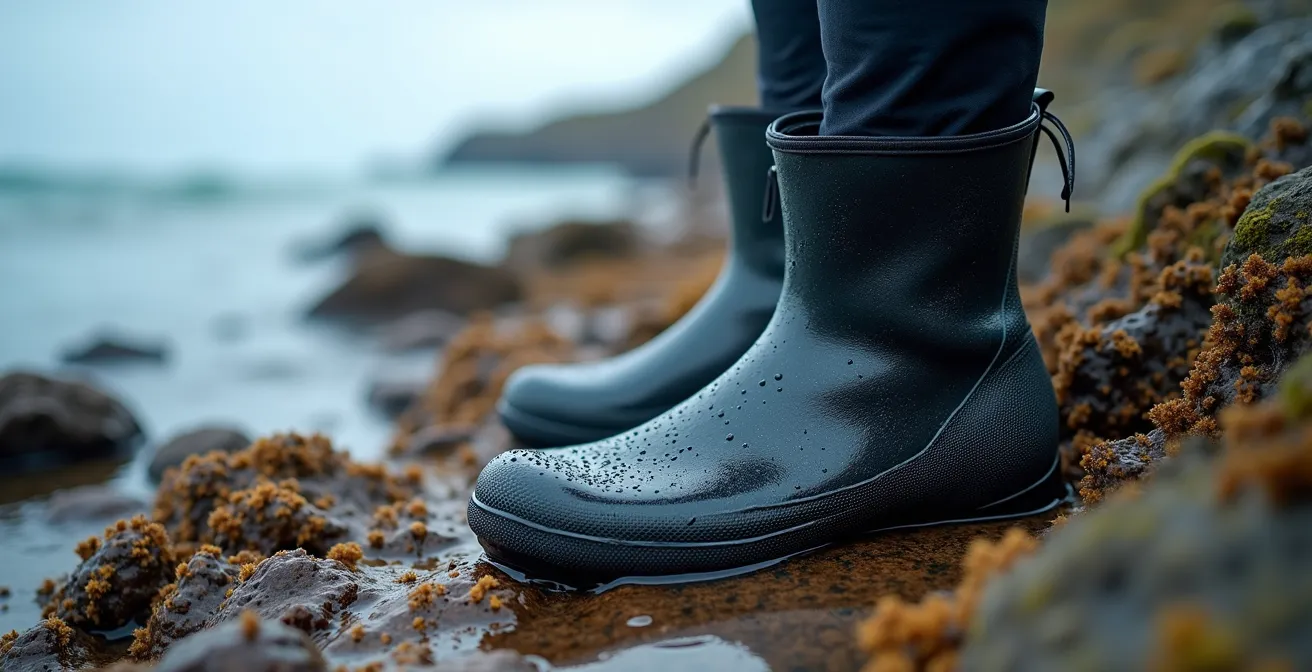
Neoprene Booties: Are They Cheating or Essential for Safety?
There’s a purist mentality in some cold water circles that suggests any gear is “cheating.” This is a foolish and dangerous mindset, especially when it comes to the rugged Atlantic coastlines of Ireland and Canada. Neoprene booties and gloves aren’t about comfort; they are about maintaining function and preventing injury. Your hands and feet are the first parts of your body to lose feeling and dexterity. This is a massive safety risk.
Imagine trying to climb out over sharp, slippery, barnacle-covered rocks when you can’t feel your feet. Or trying to operate the zipper on your changing robe with fingers that have turned into useless claws. This loss of function can turn a routine exit into a serious emergency. Neoprene creates a protective barrier, not just from the cold, but from the hazardous terrain itself. It allows you to maintain the crucial dexterity needed for self-rescue. They are not cheating; they are essential safety equipment, just like a life vest on a boat.
The necessity of this protection is proven at the highest levels. As an example, a case study on swimmer Jessi Harewicz, the only Canadian to complete an ice mile in the country’s frigid waters, underscores the point. While she completed her swims without a wetsuit, an article in Montecristo Magazine notes she is a proponent of proper extremity protection in extreme conditions. If elite athletes who swim in 3.6°C water prioritize it, beginners should consider it non-negotiable.
Cold Showers vs. Ice Baths: Which Is More Effective for Immune System Support?
The ultimate goal for many is the Atlantic, but the training ground starts at home. The two most common tools are cold showers and ice baths, and they are not interchangeable. Each serves a distinct purpose in your physiological acclimatization. A cold shower is your first and most important step. It’s not about enduring the cold; it’s about training your gasp reflex control. The shock of the spray on your chest and back is a perfect simulation of that initial water entry. Here, you practice the slow, controlled exhales that tell your nervous system you are safe.
Ice baths are the next level. They offer a static, immersive cold that cold showers cannot replicate. This is where your body learns static cold adaptation. Sitting still in 5-10°C water forces your body to manage its own heat production and vasoconstriction more efficiently over a sustained period. This is where many of the hormonal benefits, such as the release of noradrenaline, are maximized. For context, one study showed a 530% increase in noradrenaline after exposure to 14°C water, a key neurotransmitter linked to focus, mood, and inflammation reduction. This is a powerful part of the immune-supporting claim of cold exposure.
Neither is “better”; they are sequential. A cold shower prepares your mind and breath for the shock. An ice bath prepares your body’s cellular and circulatory systems for the duration. The final step before the ocean is a sheltered cove or lake, which introduces the dynamic element of moving in cold water.
This progressive approach is key to preparing for the unpredictable Atlantic. As this comparative table based on data from sources like the British Heart Foundation shows, each step has a unique value.
| Method | Temperature Range | Primary Benefit | Atlantic Preparation Value |
|---|---|---|---|
| Cold Showers | 10-15°C | Gasp reflex control | Mental conditioning for initial shock |
| Ice Baths | 5-10°C | Static cold adaptation | Physiological acclimatization |
| Sheltered Cove | 8-12°C | Dynamic cold exposure | Bridge between controlled and ocean |
| Atlantic Ocean | 5-16°C seasonal | Complete challenge | Final test combining all stressors |
2 Minutes or 10 Minutes: How Long Before Cold Exposure Becomes Damaging?
The most common question I get is, “How long should I stay in?” The answer is not a simple number. It depends on the water temperature, the conditions, and your personal level of adaptation. However, there are firm principles. For a beginner in the Atlantic (typically 8-12°C), your first dips should be measured in seconds, not minutes. The goal is to get in, control your breath for 30-60 seconds, and get out. The “two-minute rule” is a good benchmark for when you’re more adapted: most of the hormonal benefits, like that rush of dopamine and norepinephrine, occur within the first 2-3 minutes.
Staying in longer, especially aiming for arbitrary goals like 10 minutes, dramatically increases your risk without a proportional increase in benefits. The point of diminishing returns arrives quickly, and the point of danger arrives shortly after. The primary danger sign is loss of function. If you start shivering *while in the water*, it is not a sign you are adapting; it’s a non-negotiable signal from your body that your core temperature is dropping and it is time to get out immediately. Another key field test is finger dexterity. If you can no longer touch your thumb to your pinky finger or notice your hands forming a “claw” shape, your swim is over.
Your time in the water is dictated by conditions and your body’s response, not by a stopwatch. Use a structured assessment before and during every single dip.
Your Atlantic SAFE Assessment Framework
- Swell & Conditions: Check a reliable local forecast (like Magicseaweed in Ireland or local marine forecasts in Canada) for your specific beach. Don’t just look at wave height; look at the period.
- Air Temperature & Wind: Assess the wind chill. A strong Atlantic wind can make 5°C feel like -5°C, accelerating the after-drop risk.
- Fatigue & Fuel: Never dip when you are exhausted, hungry, or dehydrated. Your body needs energy to create heat.
- Experience & Exit: Halve your usual time in unfamiliar locations. Always identify your entry and exit points before you get in.
- Function Tests: Every 2 minutes, test your coordination by touching each finger to your thumb. Exit immediately if shivering begins or you notice “claw hands.”
As Dr. Lee Hill, an expert interviewed by the American Heart Association, states unequivocally in a piece on cold water risks, “Never, ever do a cold water swim on your own. That is a recipe for disaster.” This rule is absolute, as even a two-minute dip can become incapacitating without warning.
The Buddy System: Why You Should Never Dip Alone in Open Water?
The number one rule of open water swimming is immutable: never go alone. But a “buddy system” is more than just having someone in the water with you. It is a formal safety contract. It means having a designated shore spotter whose only job is to watch. This person is your lifeline. They are sober, warm, and have a phone with emergency numbers ready (like 112 or 999 for the Irish Coast Guard, or 911 in Canada).
In the water, your buddy is there to monitor you for signs of trouble you might not notice yourself, such as slurred speech or disorientation. On the shore, your spotter is watching for both of you. They are tracking your time, watching for changes in the weather, and ready with warm gear and a hot drink. This is the system used by experienced swimming groups across the Atlantic, from the famous Forty Foot swimmers in Dublin to communities along the coasts of Nova Scotia and British Columbia.
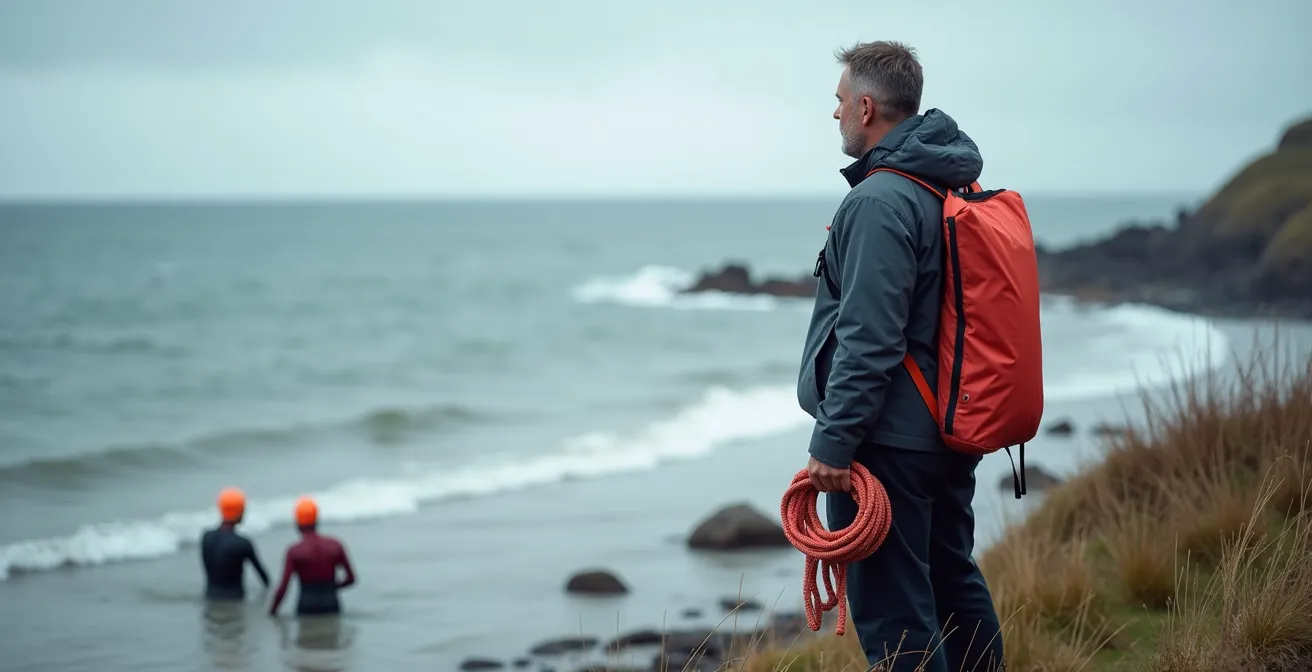
These established groups have protocols born from experience. For example, as highlighted by Water Safety Ireland, groups often conduct mandatory pre-swim briefings. These cover entry/exit points, known hazards like currents or rocks, maximum time limits based on the day’s conditions, and emergency hand signals. This isn’t casual; it’s a structured approach to mitigating risk in a powerful environment. Joining a local group is the single best thing a beginner can do. You not only gain a safety network but also a wealth of local knowledge about safe and beautiful spots to swim.
Why Is the “Gasp Reflex” the Real Killer in Cold Water Kayaking?
While the title mentions kayaking, the principle is universal and it’s the first and most immediate danger you face: the cold shock response, or “gasp reflex.” When your torso and face are suddenly plunged into cold water, your body triggers an involuntary, deep gasp for air. If your head is underwater when this happens, you will inhale water. This is not a matter of willpower; it is a deep-seated physiological reflex. The National Center for Cold Water Safety explains that this is coupled with a massive, instantaneous spike in heart rate and blood pressure. For anyone with an underlying heart condition, this shock itself can be fatal.
This initial 60-90 seconds is the most dangerous phase of your entire dip. The goal is not to prevent the cold shock—you can’t—but to control your reaction to it. This is why you must always enter the water slowly and deliberately. Never jump or dive in. As the water level rises up your body, focus on one thing: a long, slow, powerful exhale. Make a “Tssss” sound. This forces your diaphragm to engage and overrides the impulse to gasp. Keep exhaling as you immerse yourself. It gives your brain a task and signals to your panicked nervous system that you are in control.
The loss of breath control is catastrophic. As research from cold water safety experts demonstrates, your breath-hold time can plummet from 45 seconds to a mere 9.5 seconds in 5°C water. You have no margin for error. Mastering that first-minute breathing is the foundational skill that makes everything else possible. Practice it in a cold shower until the response becomes automatic: cold hits skin, you exhale slowly.
Cold water immersion causes an instantaneous and massive increase in heart rate and blood pressure because all the blood vessels in your skin constrict in response to sudden cooling.
– National Center for Cold Water Safety, Cold Shock Response Research
The “It’s Too Cold” Excuse: How to Build the Mental Resilience to Go Outside?
On a grey, windy Atlantic morning, your warm bed will present a very compelling argument against going for a dip. The “it’s too cold” excuse is the biggest barrier to consistency. Building mental resilience isn’t about ignoring the cold; it’s about reframing your relationship with discomfort and having systems in place to bypass your own internal negotiations.
One of the most powerful mental models comes from endurance athlete Ross Edgley, who swam 1,792 miles around Great Britain. His secret weapon was the “5-Yard Commitment.” Don’t commit to the swim. Just commit to putting on your gear. Don’t commit to putting on your gear. Just commit to getting out of bed. Don’t commit to getting out of bed. Just commit to putting your feet on the floor. Break the overwhelming task into a series of ridiculously small, non-threatening steps. Often, the hardest part is simply starting the process. Once you are dressed and at the water’s edge, the momentum often carries you through.
Another key is to externalize your motivation. This is where a swimming group or a single, reliable partner becomes invaluable. It’s much harder to back out when you know someone is waiting for you. This creates social accountability. Finally, embrace the Wim Hof philosophy: “The cold is merciless, but righteous.” View the cold not as an enemy to be conquered, but as a teacher. It demands your full presence and respect. It burns away trivial thoughts and leaves you with a profound sense of clarity and accomplishment. The goal is not to win, but simply to show up. Celebrate the act of getting to the water, regardless of whether you get in or for how long.
Key Takeaways
- True safety in cold water comes from understanding and managing physiological responses (gasp reflex, after-drop), not from brute endurance.
- A structured, progressive acclimatization plan (showers, then baths, then sheltered water) is essential before tackling the open Atlantic.
- Your safety gear (booties, gloves, windproof robe) and your buddy system (with a dedicated shore spotter) are non-negotiable professional tools, not optional extras.
How to Start “Rucking” (Weighted Walking) to Build Resilience in Bad Weather?
Your resilience to the cold is not just built in the water. It’s built on land, in all weather conditions. One of the most effective and complementary training methods for an Atlantic dipper is “rucking”—walking with a weighted backpack. It’s a simple, low-impact way to build the physical and mental fortitude required to handle the harsh coastal environment. For swimmers, it serves a powerful dual purpose.
Firstly, rucking to a remote swimming spot is a perfect warm-up. The steady-state cardio elevates your heart rate and pre-warms your muscles and core. You arrive at the water’s edge already warm and primed. Secondly, the ruck back is the ultimate tool for combating the after-drop. After changing into dry clothes, you load your wet gear into the backpack. The added weight forces your body to work harder on the walk back, generating significant internal heat and accelerating your rewarming process far more effectively than passively sitting in a car. Many experienced swimmers in Ireland and Canada integrate this method, using coastal paths to access stunning, secluded beaches.
This “Ruck & Dip” strategy turns the entire journey into part of the training. In Ireland, swimmers use sections of the Wild Atlantic Way or the Wicklow Way. In Canada, sections of the East Coast Trail in Newfoundland or coastal loops in Nova Scotia offer perfect terrain. It builds weather-proof resilience and makes you comfortable being active outdoors when conditions are less than perfect.
The synergy between rucking and dipping is clear across different Atlantic terrains, as this table inspired by resources from both Ireland and Canada illustrates.
| Country | Iconic Trail | Swimming Spot | Distance | Terrain Challenge |
|---|---|---|---|---|
| Ireland | Wicklow Way | Brittas Bay | 3-5km approach | Boggy paths, coastal winds |
| Ireland | Connemara Loop | Dogs Bay | 4km circuit | Rocky terrain, Atlantic exposure |
| Canada | East Coast Trail (NL) | Sheltered coves | 5-8km sections | Cliff paths, extreme weather |
| Canada | Lawrencetown Loop (NS) | Beach access points | 6km circuit | Sandy/pebbly, strong winds |
Now that you understand the principles of physiological control, progressive acclimatization, and the essential safety protocols, you have the framework to approach the Atlantic not with fear, but with educated respect. The journey is one of incremental steps, each one building your confidence and your body’s resilience. The final step is to put this knowledge into a consistent practice, starting today. To begin this journey safely, it is critical to never forget the foundational skill of controlling your gasp reflex, the very first challenge the water will present.